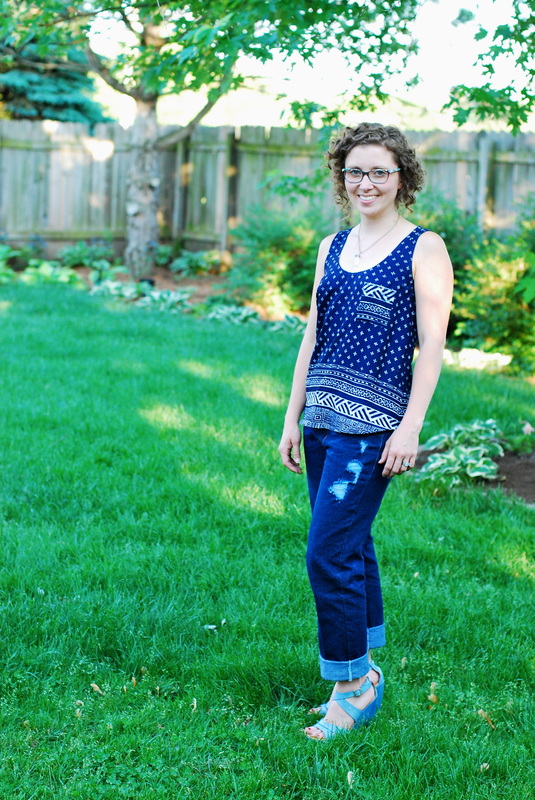
 The sun is shining and temperatures are rising here in Illinois. Weather like this makes it hard to want to spend any amount of time indoors. Lately, the focus of my productivity is heavily concentrated on yard work and gardening. But, there's nothing like a new pattern release to kickstart the creative engine, and the latest Closet Case Patterns got me really revved up and ready to sew! 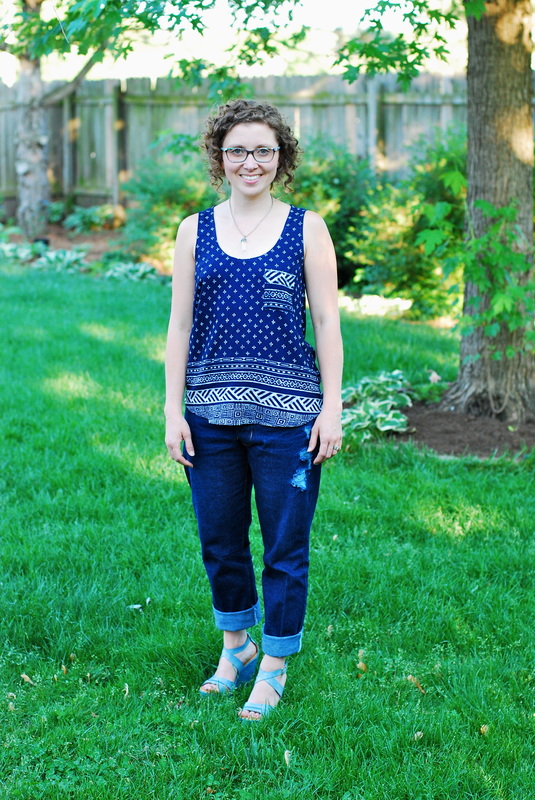 Morgan Jeans are a relaxed fit boyfriend jean. They're intended for use with rigid, non-stretch denim fabrics. As a newbie jeans maker, I have a limited knowledge base on denim fabric. Mostly, I'm learning about different fabric characteristics as I sew. The denim I used to sew these jeans was purchased at Vogue Fabrics warehouse sale. The warehouse sale provides a great opportunity to get excellent per yard prices on fabric, with the catch that you have to buy entire rolls in order to purchase fabric at those prices. Fortunately, I went to the sale with a group and was able to split two rolls of different denims with other sewers, but I still ended up going home with a giant pile of fabric. I wasn't exactly sure what I would sew with this denim at the time I bought it. I found a jeans pattern for Mike (that I haven't opened yet) that will work well with this denim. If this denim was raw denim at the time I bought it, I completely "ruined" it by pre-washing it as soon as it came into the house. I can't be certain what weight this fabric is, but I estimate it to be either 12oz or 12.5 oz. It's heavier than the other types of denim I've worked with and the lack of stretch fiber makes it fairly inflexible. 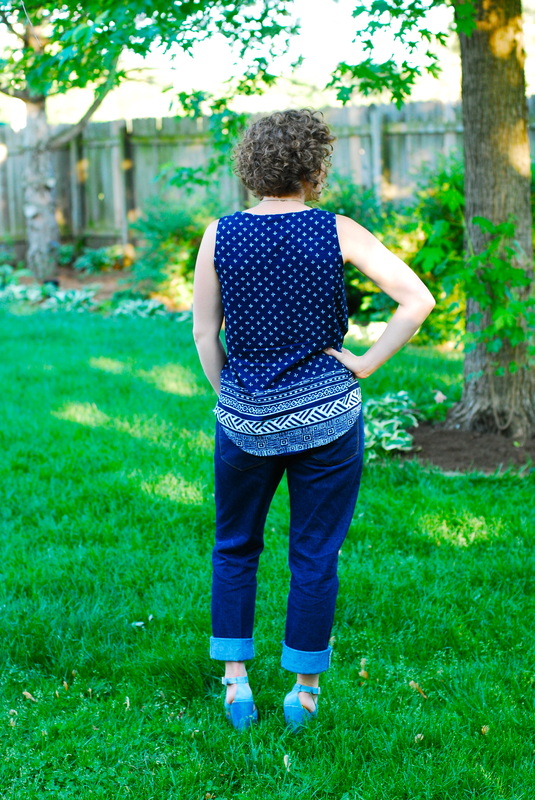 Knowing that this fabric would not allow for a lot of flexibility, I decided to cut them a size bigger than I cut my Ginger Jeans. This pair of Morgan jeans are a straight size ten with the rise shortened by 1.25". They sit below my natural waist, but above the fullest part of my hip curve. I cut the full length version of these jeans, because I knew I wanted to have the option to cuff them. After I'd constructed them, I took a solid four inches length from the bottom of the leg before hemming. 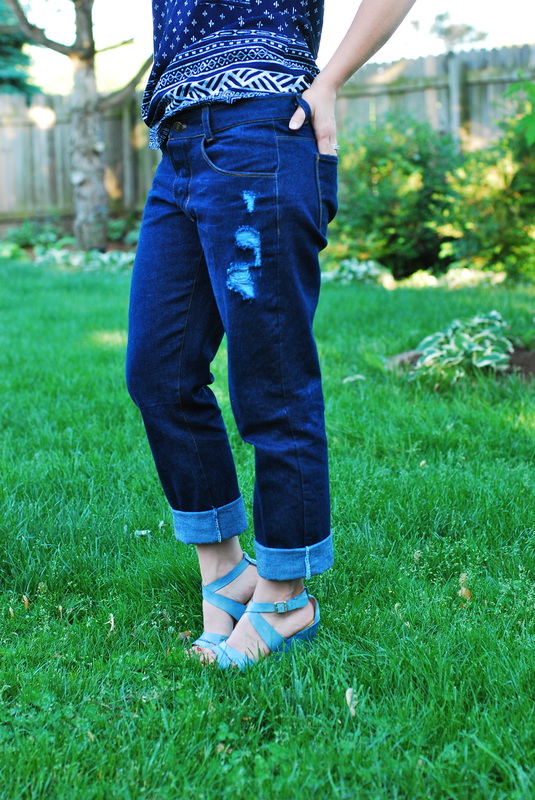 Once I'd sewn these jeans together, I decided to be adventurous and do a little bit of distressing. I have to tell you, this was only slightly terrifying. I've never distressed anything before, and the risk of potentially destroying something I'd spent hours creating lingered in the back of my mind the entire time I worked on these. Before getting started, I did a little bit of research. I settled on methods for dry processing my jeans. This basically means, I didn't use any sort of chemical wash or bleach to fade or distress them. Instead, I worked on my jeans while they were dry using sand paper and a lemon zester. I found it very helpful to look at a variety of different jean fades as inspiration. This website has a nice archive of raw denim fades to flip through to see different wear patterns and markings. And, I found this video very helpful as a starting point for figuring out how to position my whiskers and use sandpaper for hand scraping fade patterns down the fronts of my legs, around the curve of my bottom, and over the edges of my waistband and pockets. 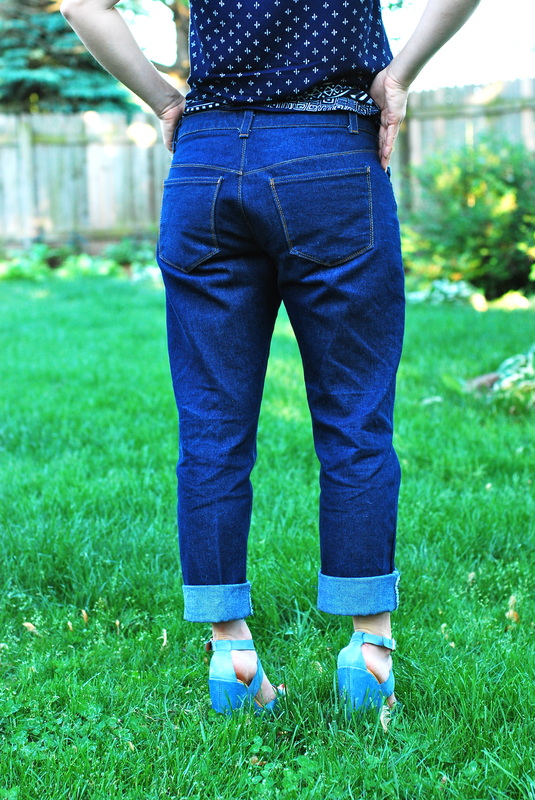 The overall effect of my dry processing is subtle, but I assure you, it's a drastically different look from the solid indigo I started out with. The rest of my distressing was done using a lemon zester, my seam ripper and this instructional. I considered going farther with my distressing, but decided to save that for future pairs. Now that my confidence is a little higher, I don't think I'll have any problems shredding into my next pair of Morgan jeans. There's really nothing to fear; I would advise you to practice with your tools before starting to work on your garment. I practiced with three different grits of sandpaper, hand sanding, and power sanding before settling on a combination of 220 grit hand scraping. I also roughed up scraps with my lemon zester before tearing into my jeans. Also, I caution you to take care when you're sanding over any areas of top stitching. I was careless and accidentally popped a couple stitches. 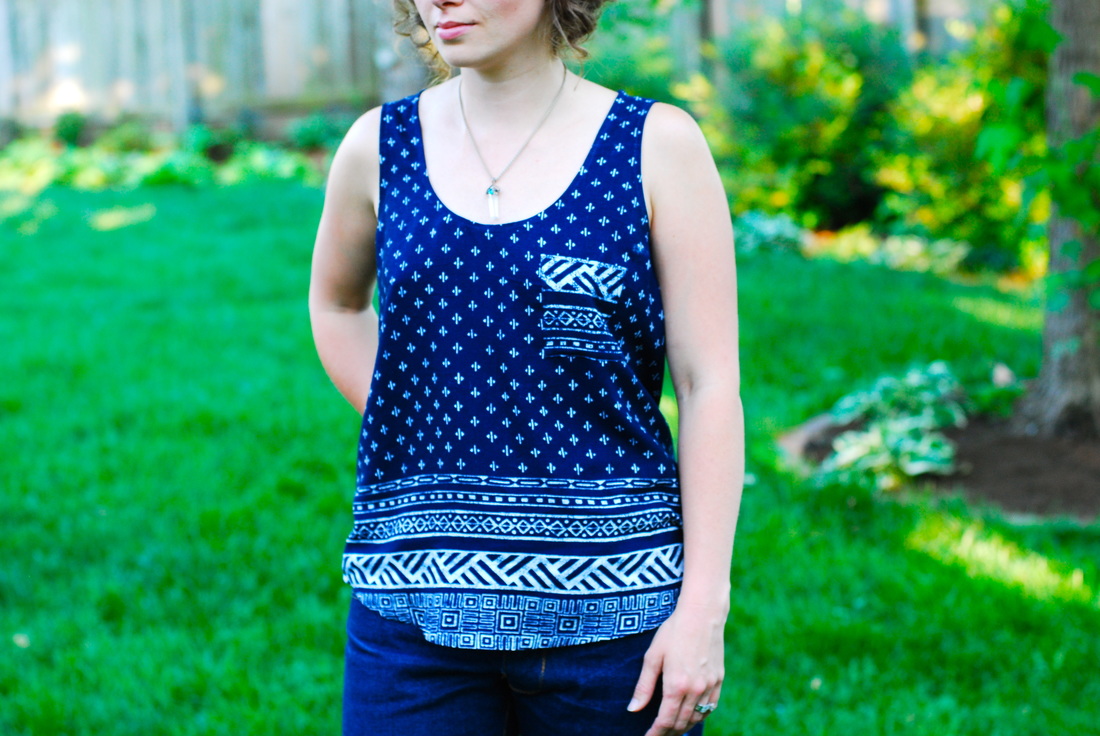 Up top, I'm wearing a Wiksten Tank. This is one of those patterns I bought ages ago and let sit in the corner. Now, I'm kicking myself, because I could have a stack of these sewn and in rotation if I had been better about organizing my projects and priorities. This is a fabulous summer top! There's nothing fussy about it, which is exactly why it's so great. I sewed this version using a border print rayon purchased at an estate sale. This pattern was wonderful for letting the fabric shine, and the pocket really let me highlight the print. I chose to eliminate the armhole and neckline bindings on this. I didn't feel they were necessary. Instead, I double folded and stitched each, just as I did the hem. 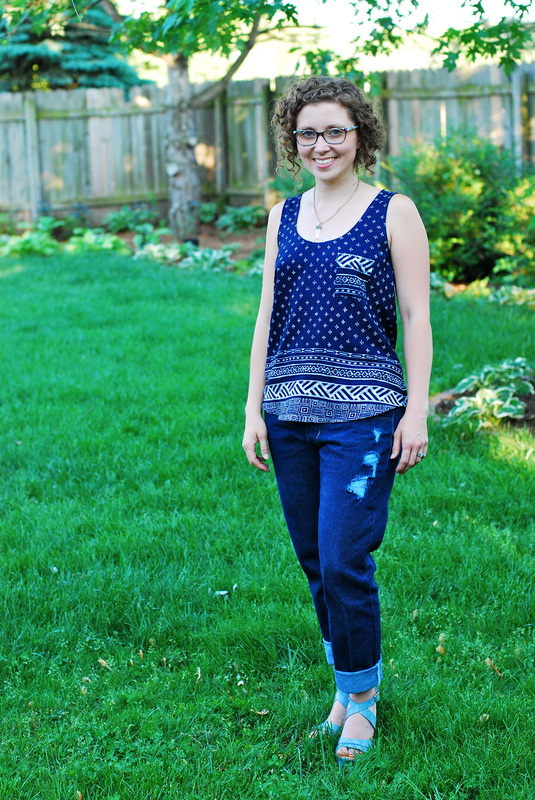 I'm very pleased with the results of both these patterns, and know that I'll be sewing each of them again. Now that it's consistently nice outside, I'm starting to think more about summer sewing. I don't have any specific plans at this point, but I'm leaning in the direction of separates with scattered dresses. I sewed a lot of dresses last year and I think I could benefit from incorporating a bit more variety. We'll see how things play out. What sewing plans do you have set for the shifting season?
6 Comments
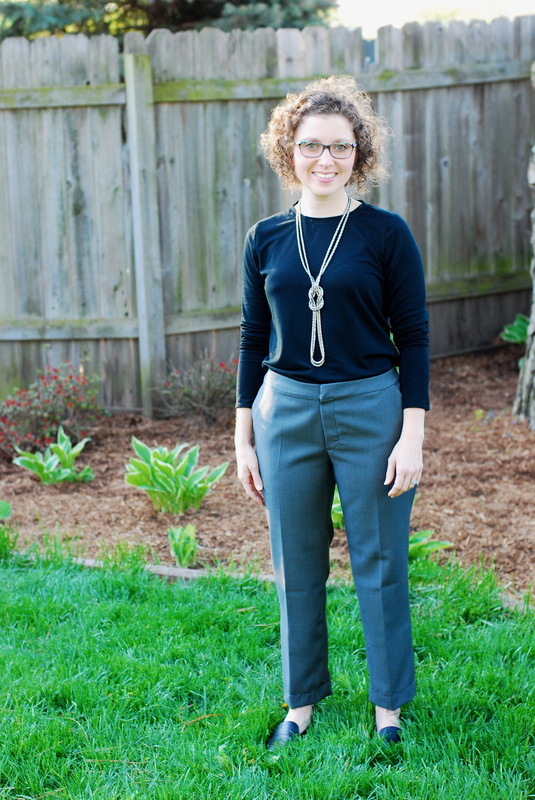 It's that time of year! It's MAY! Spring is on its way (in theory) and makers from all corners of the internet pledge to flaunt their Me-Made wardrobes throughout the course of the month! 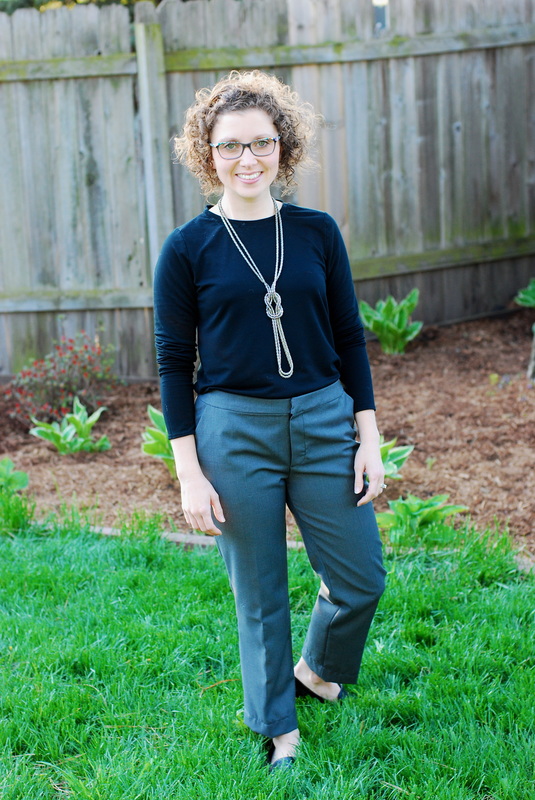 This is my third year participating in Me-Made May. Already, this year is a little different for me than it has been in years past. I'm proud to say that I've done great work of building a really wearable wardrobe over the course of the last year! Previously, I found myself scrounging in the back of my closet for makes that never see the light of day and struggling to incorporate those garments into wearable outfits. This year, my biggest obstacle is making sure that I keep up with the laundry, because all of my favorite makes rotate through my wardrobe cycle on a regular basis! 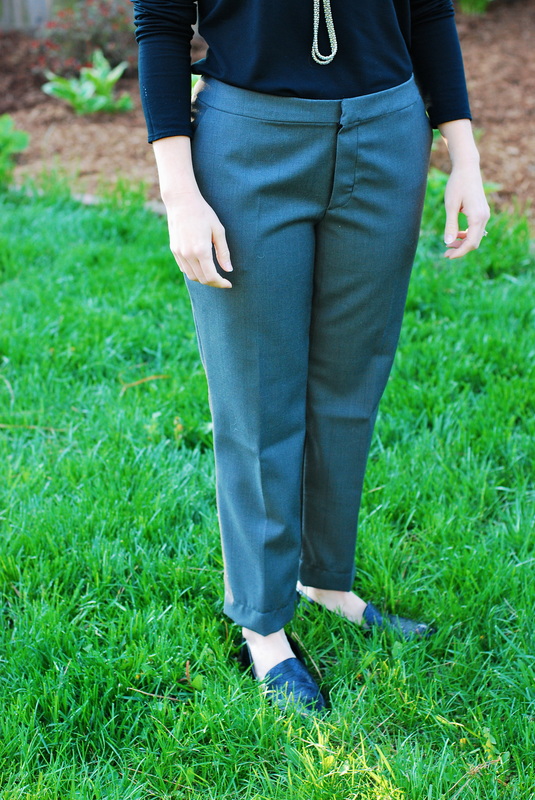 I'm also very pleased to say that my efforts to sew more pants are paying off! All of my pants see a lot of love, including the pants in this post. These pants are my second pair of Manhattan Trousers. I cut and sewed this pair exactly as I sewed my first pair. The fabric I used for this version is a lighter weight wool suiting fabric, and surprise, the fit is different than with my first pair. However, that's not a bad thing in this instance. My first pair fit nicely, but I wish I had allowed for more room in the thigh to accommodate for sitting ease. This pair is much less rigid and doesn't feel at all restrictive when I sit. It's just another instance where I'm learning the subtle differences fabric choice makes in the final product. I'm curious to see how the fit changes with cottons and other types of wool. I plan to sew a small arsenal of these pants and already have some other basic bottom weight fabrics picked out of the stash. It's easy to build on a good foundation, and these pants serve that purpose. 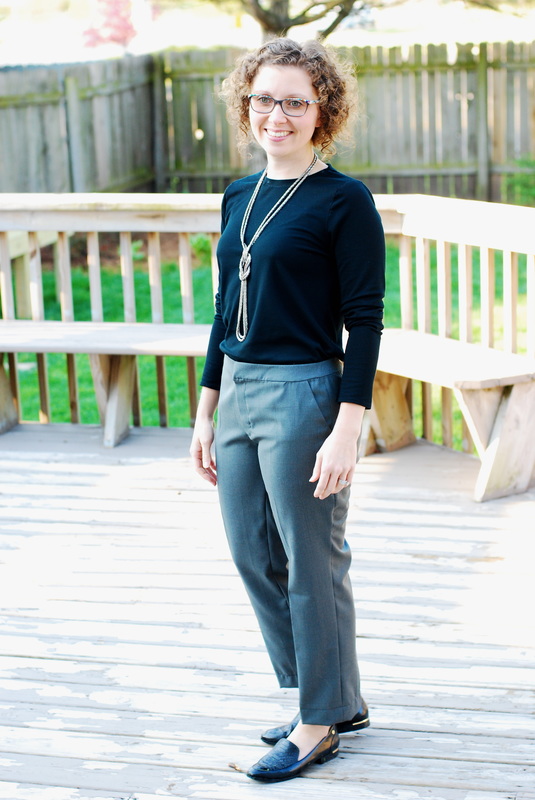 Up top, I'm wearing a Grainline Studios Lark Tee. This pattern is just a really great basic tee pattern. Simple as that. A good tee is probably the most utilitarian garment a person can have. 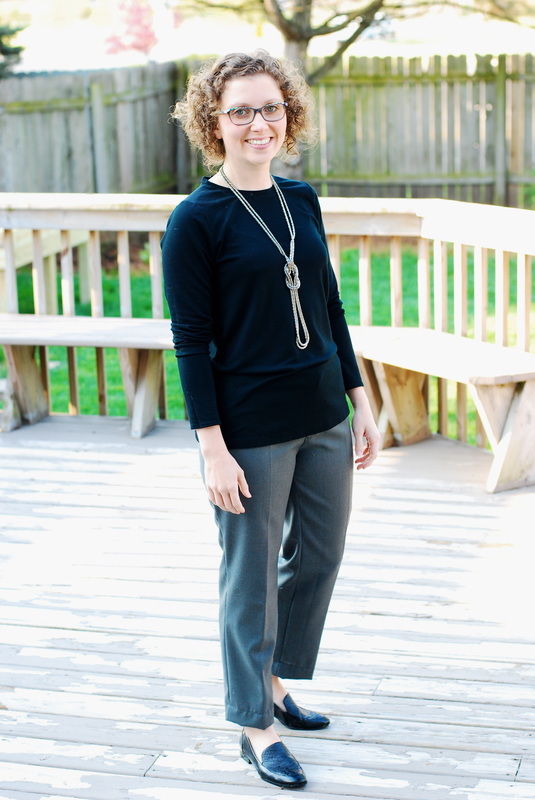 For the duration of May, I've pledged to wear at least two Me-Made Outfit components each day, and I'm posting my daily updates on instagram (tresbienmichelle). Are you participating in MMMay16? What have you challenged yourself to accomplish with your makes this month?
|
    Archives
March 2017
|
