|
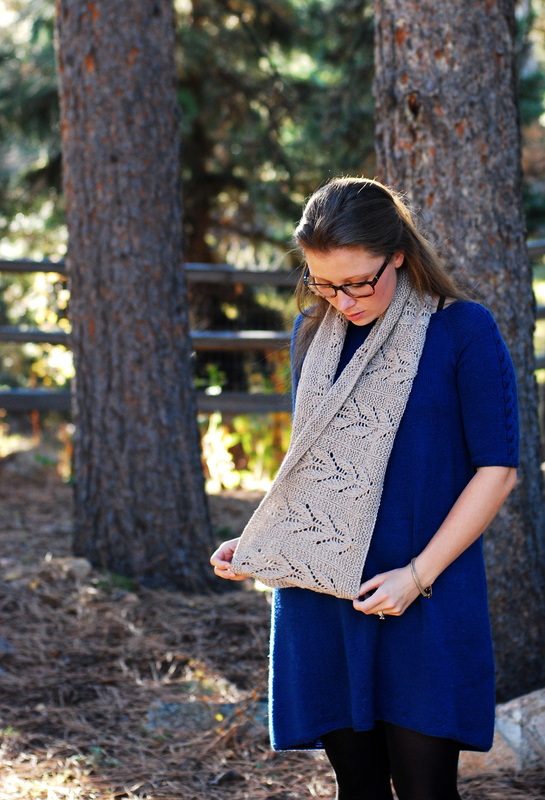
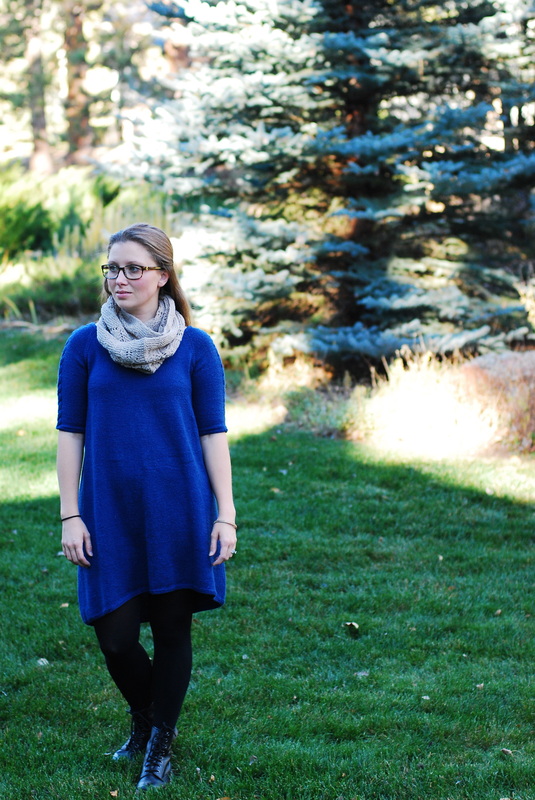
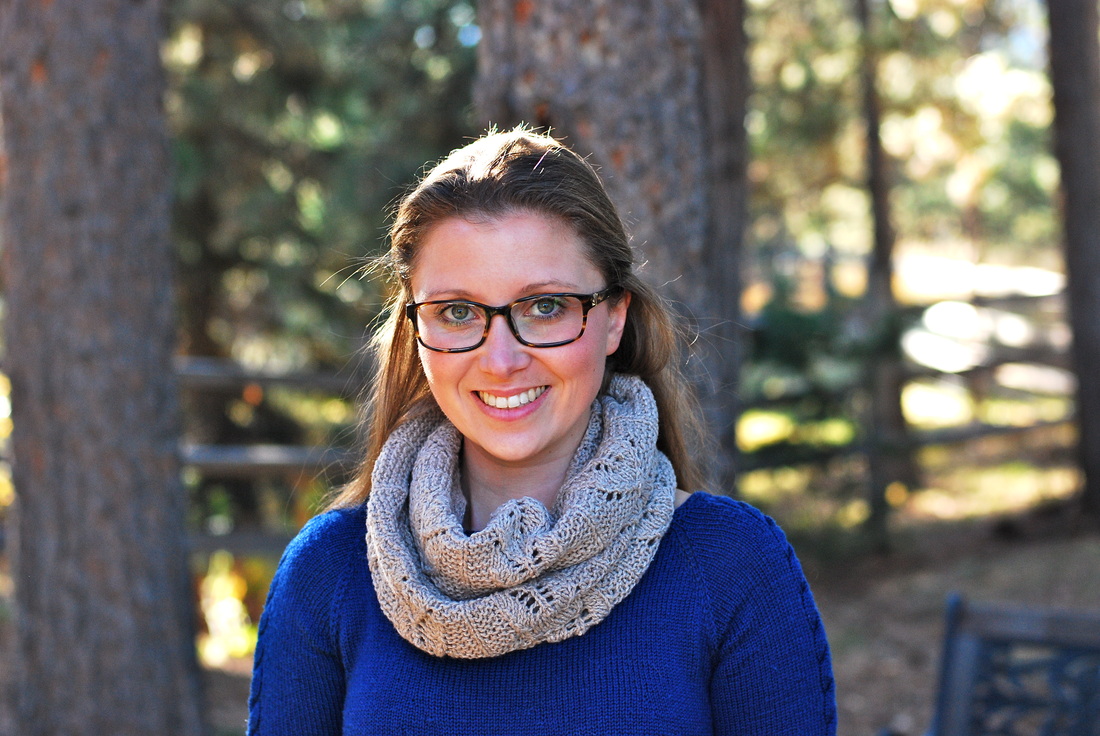
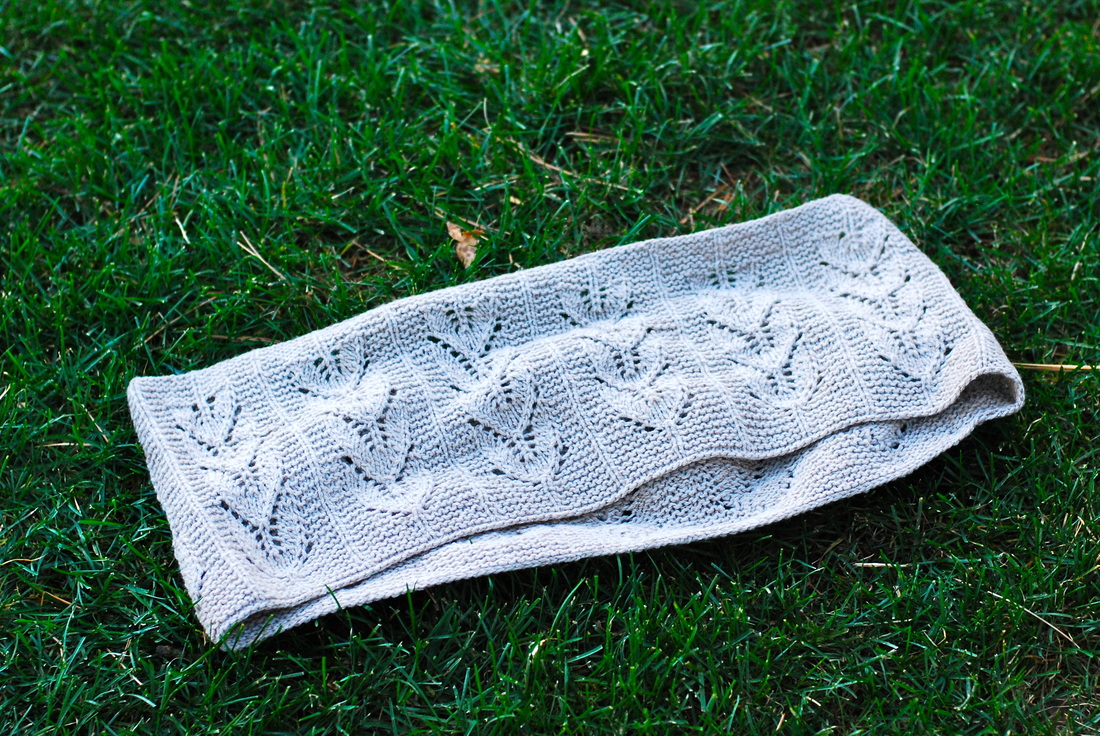
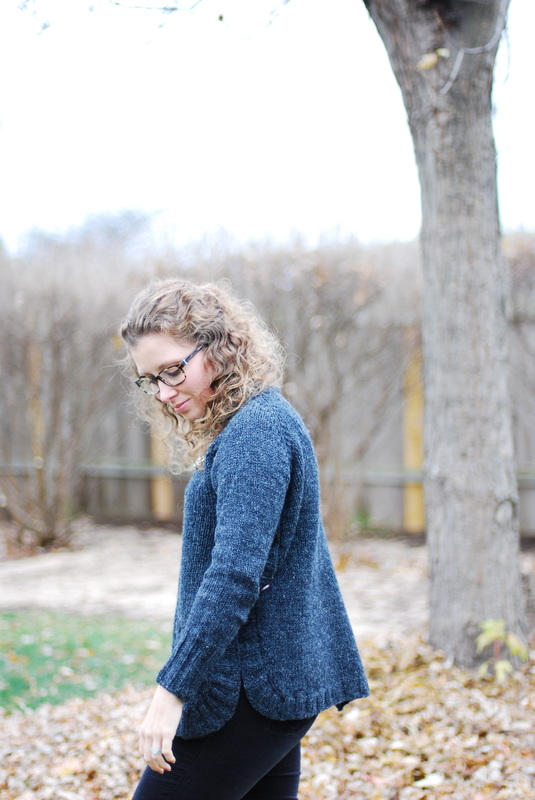
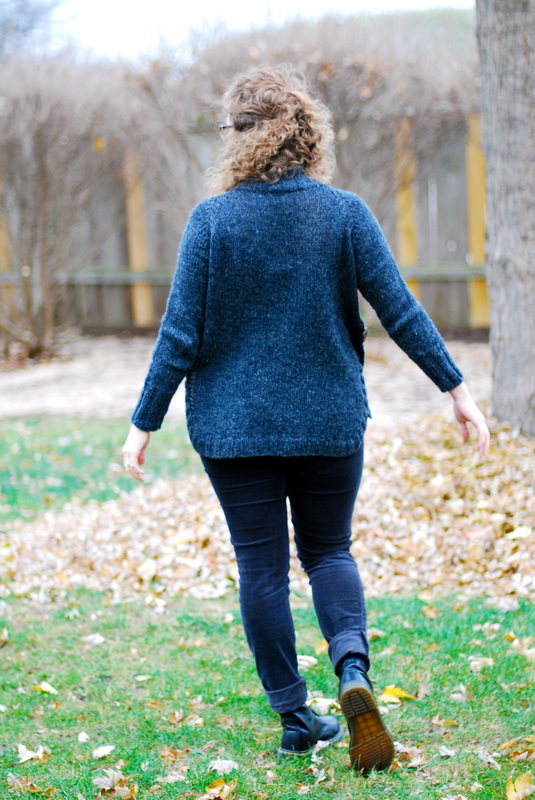
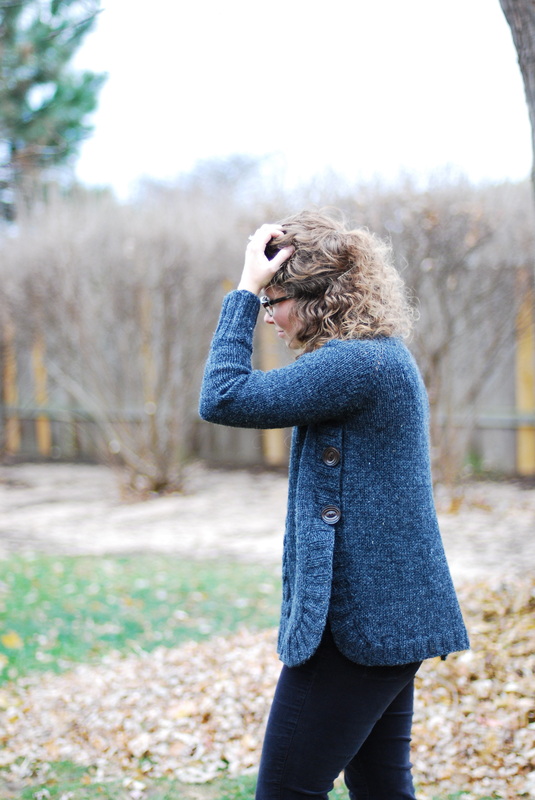
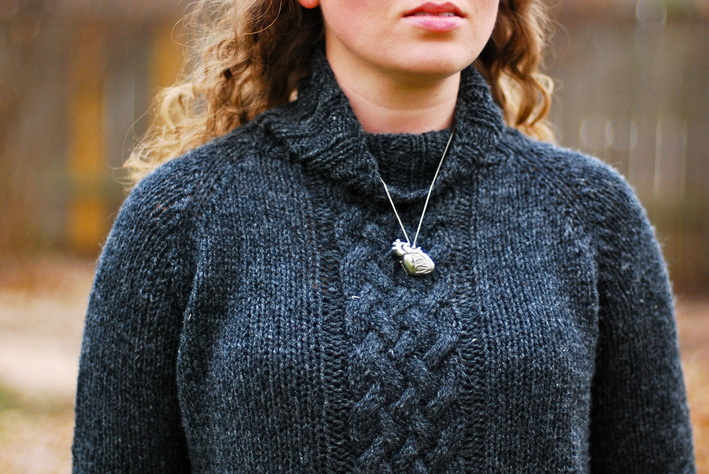
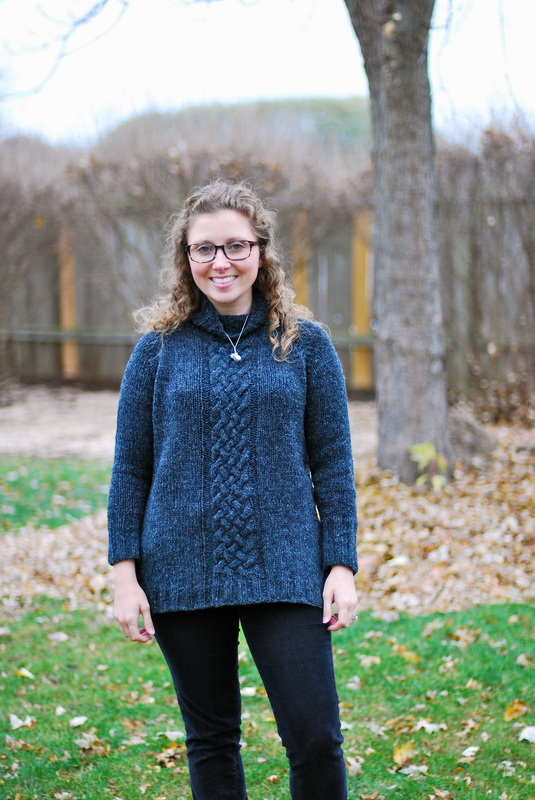
Every year when winter arrives, I find myself scrambling for wooly winter accessories. And, each year I promise myself that I'm going to knit a pile of scarves, mittens, hats, cowls, etc... for NEXT YEAR. I've really been caught in a loop on this since I started knitting. I'm not sure why. Compared to sweaters (or sock weight dresses *cough*) knitted accessories are simple, satisfying and QUICK. My latest string of sweater knitting provided the perfect opportunity to break the cycle. If knitting was running, sweater knitting would be a half-marathon. You need to train for it- build-up to it. It's a big commitment and consumes large portions of your free-time. A cowl is much more like a 5k 'fun run'. It's relaxed and easy. It doesn't require much training- there are people walking the whole distance. You cross the finish line and you can still feel your legs. You finish the race and feel pretty ready to run again immediately. When you're preparing for a half-marathon you do shorter runs leading up to the race as a way to condition yourself. That's exactly what this cowl is. For a while, I was knitting a half-marathon every time I started a new project. It was fine for a while, but the effects started taking a toll on me. For the first time in my knitting life, I was feeling a little burnt out. I started working-in smaller projects between sweaters: cowls, mittens, baby gifts (lots of babies lately). And, I started to feel better. Strangely, I started working through projects even quicker than I had before. AND, I'm happy to report, I have a growing pile of winter woollies. Two birds. One stone. How do you combat creative burn-out? I can hardly believe it's been a month since we took these pictures during our visit with friends in Colorado. I'll have to ask to be certain, but I don't think the grass is green anymore.
Pattern: Lowbrow Cowl by Thao Nguyen Yarn: Rowan Silky Tweed
6 Comments
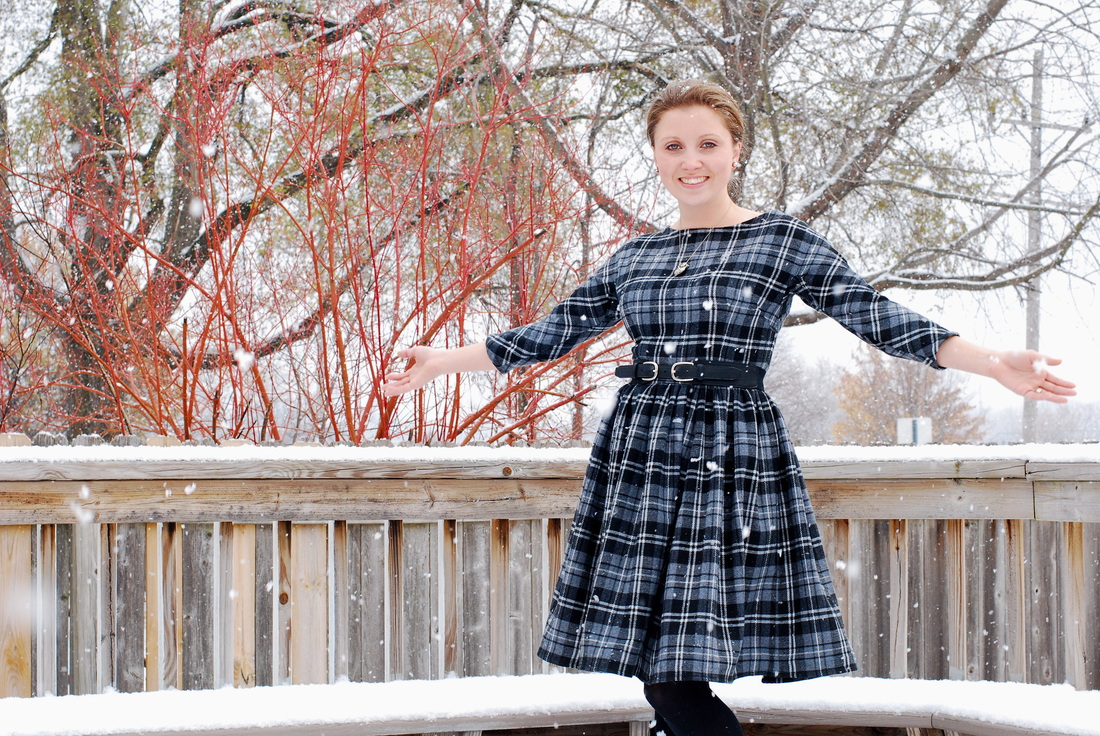
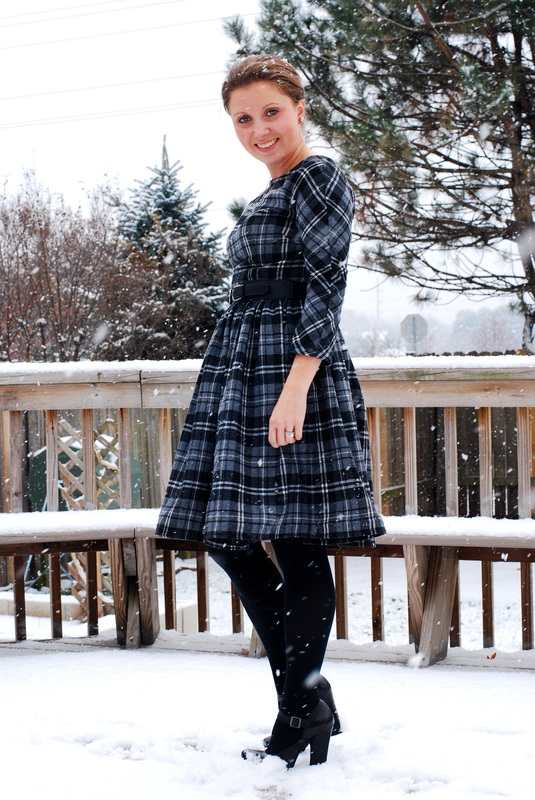
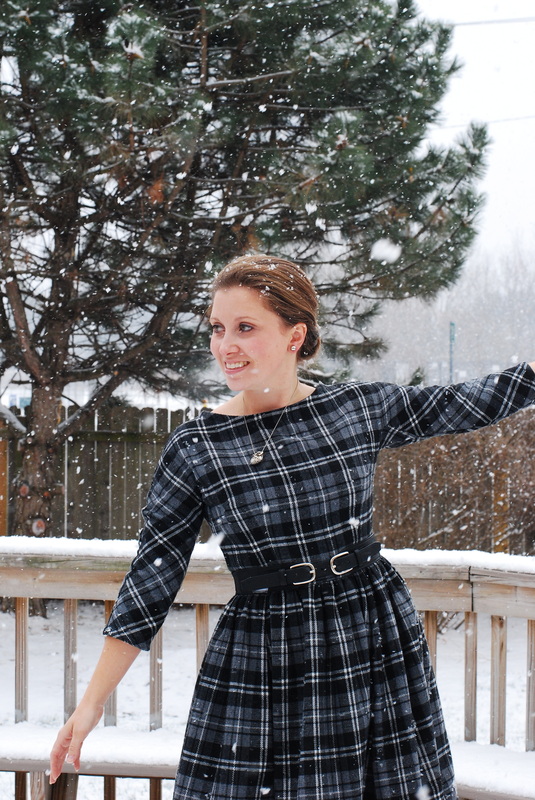
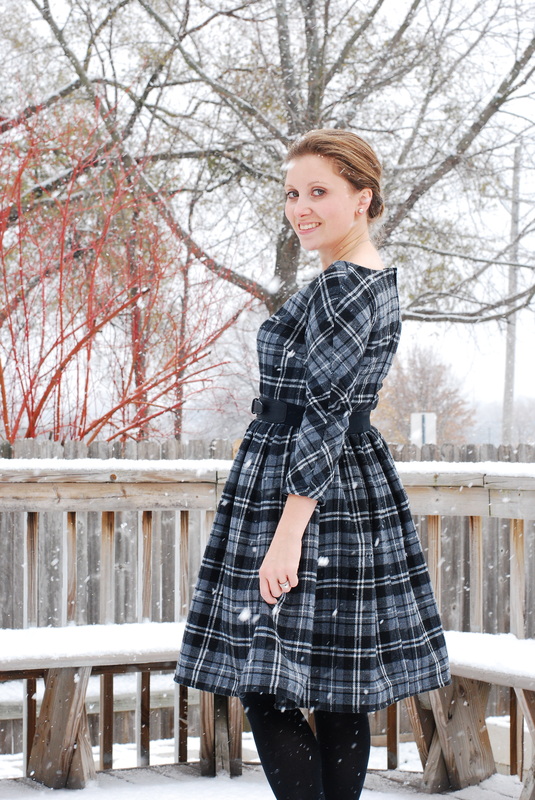
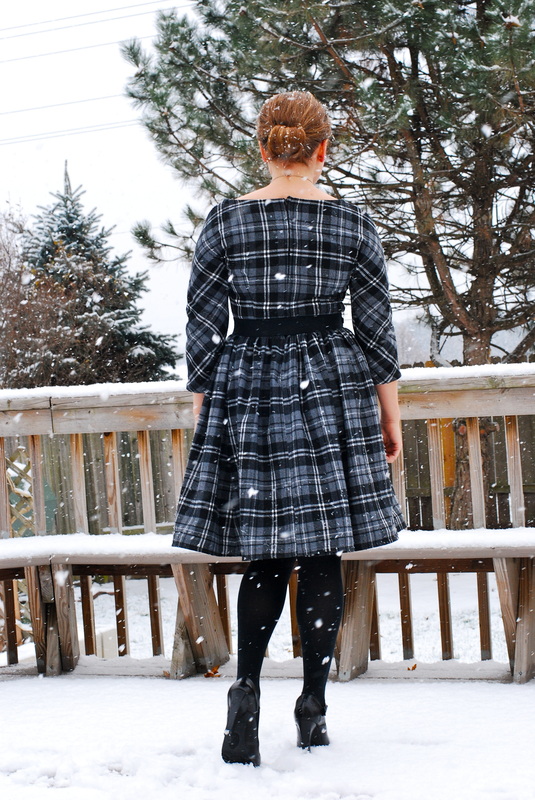
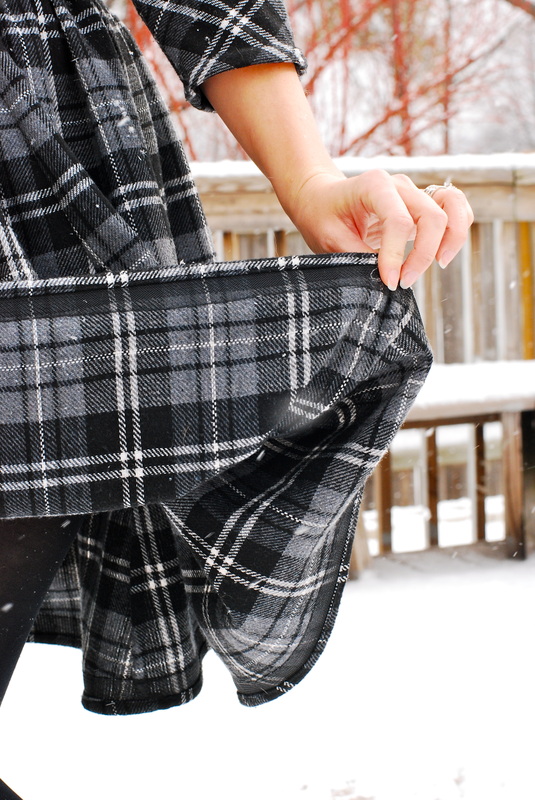
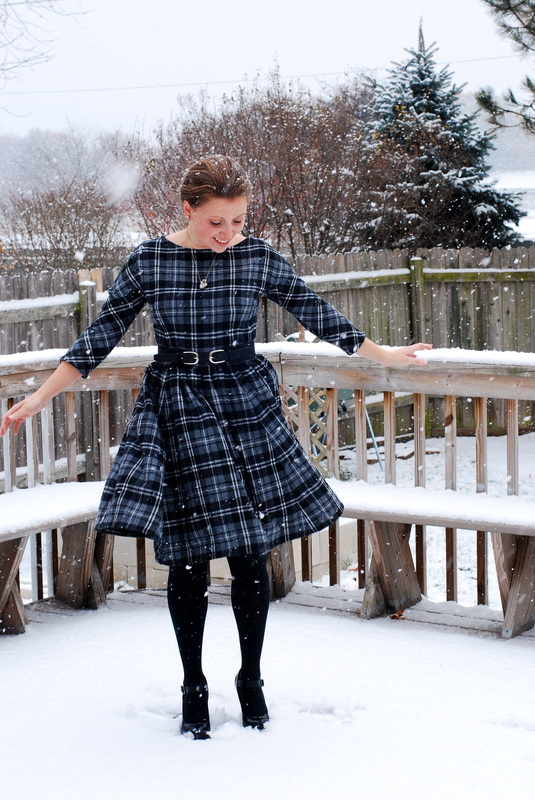
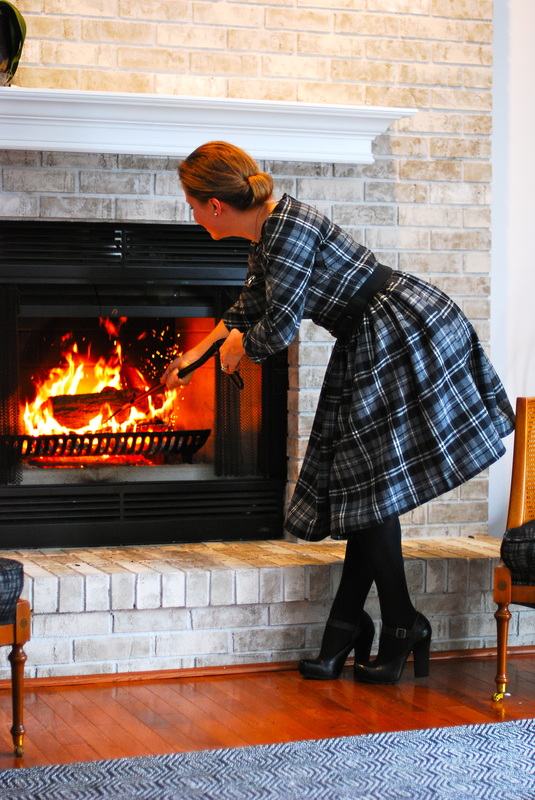
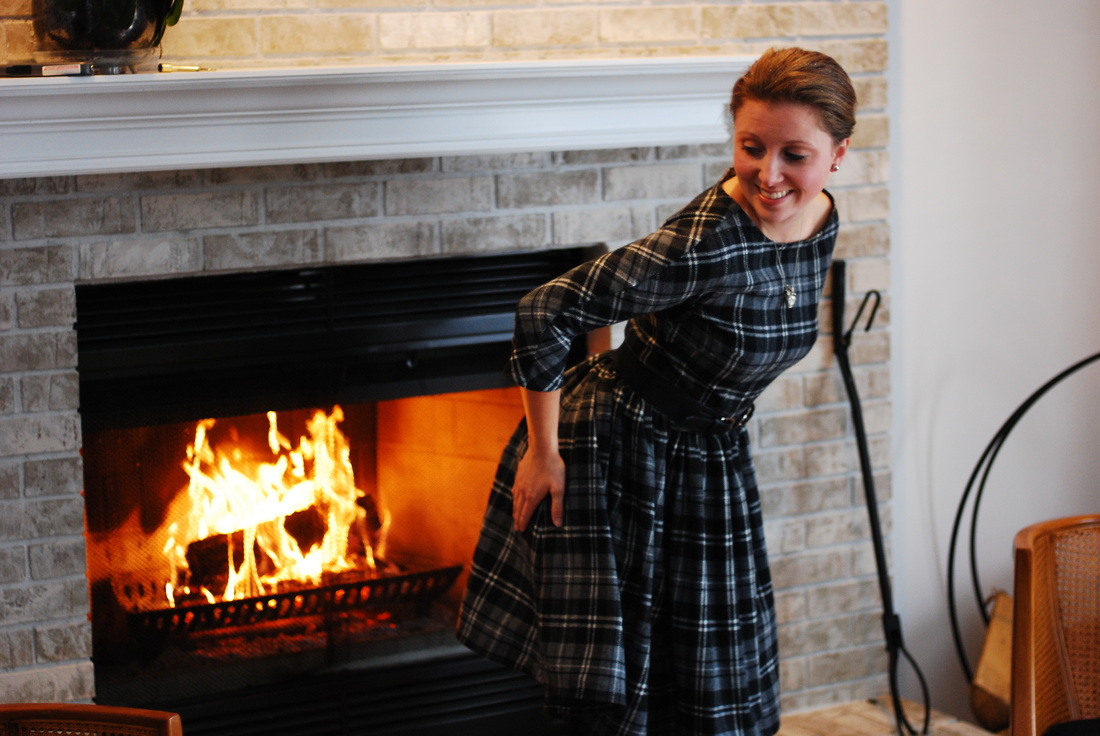
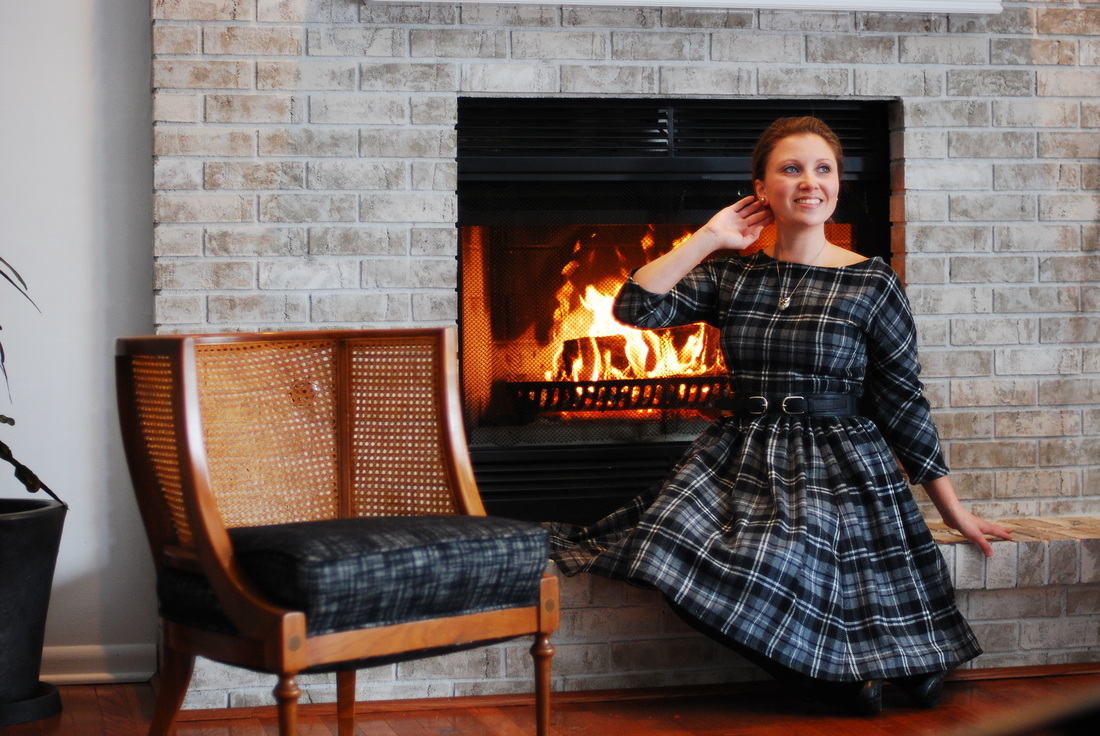
Welcome, friends, to my winter wonderland (haha). Wasn't it nice of the snow to pop-in for blog photos? It really was an appropriate and very scenic way to document my recently finished cold-weather dress. Throughout the month of November, I've been playing along with Bimple&Pimble on instagram for a photo challenge she calls #bpsewvember. It's a fun little game wherein each day of the month has been assigned a theme. Anyone participating snaps a picture relating to that theme and adds the hashtag. One of the themes was 'signature style'. It was challenging for me to put my thumb on what, exactly, I define as my style. I came up with: comfortable, vintage without being overtly era specific, classic, and quirky. More and more, that description applies to all of the things I make. Funny, I don't think it was a conscious process. It's been quietly evolving in the background. This probably happens to a lot of us who take advantage of the opportunity to customize the things we wear. Knitters fabricate the very fabrics their garments are made of and have options in pattern, yarn content, yarn color, etc... We can also make fit modifications as we work and tweak a garment until we're happy with the result. Sewing is much the same. I suppose it makes sense, that by repeatedly taking liberty with the array of options we have at our disposal, each of us hones our style with each project. After enough projects and preferences, certain themes or ideas start to recur; I guess that's what style is. This recent make conforms wonderfully with my definition of signature style. Although, in recent years, I haven't been wearing as many dresses as I used to. A few years back, I wore a skirt or dress daily. It's really easy to feel put together when your entire outfit consists of a single item of clothing. For one reason or another, I cycled out of the practice. Burn out, perhaps? After making this dress, I think I'm ready to bring a few back into rotation. This particular dress was sewn with cold weather in mind. The fabric is a wool/poly blend I bought from TDO during a sewing blogger meet-up. It was a remnant, and I'm pretty sure it is upholstery weight. It's heavy. It's also cozy and warm. I sewed from vintage Advance 9441 (another #vintagepledge!) Normally, I add a lining to all my dresses, but the fabric is weighty and the skirt is insanely full, so I decided to go without one. The pattern goes together very quickly. To make things even easier, I opted out of facings and finished the neckline and the center-back seam with bias tape. I kept the rest of the inside pretty with french seams. The sleeves are cut-on to the bodice. I spent a lot of time matching up the plaids across the horizontal seam lines, but I completely overlooked the top sleeve patterning. It looks messy. It's the sort of thing that makes me crazy. I care less than I would normally, because I really love the dress, overall. And, my misstep won't prevent me from wearing it. The most time consuming, and most worthwhile, part of this project was sewing horsehair braid into the hemline of the skirt. The horsehair braid works wonders at giving the skirt body and adds a little extra swish. I think this dress pattern is a great classic. It's delightfully June Cleaver, but works well with modern accessories. Mixing eras is one of my favorite things. I should add that to my above style description. Actually, that might be the most predominant element of my style. Our whole house is decked-out an eclectic blend of 1920s-now. Speaking of interiors... we brought the photo-taking indoors to warm-up, and I tried to strike some June-esque poses. June likely would have left the fire to Ward while she was in the kitchen warming some buns. Not those buns.... I fail at domesticity. Finally, my very best June Cleaver. How do you (or don't you) define your style? What changes? What stays the same?
I'm usually pretty pleased with most of the things I make. I know that comes across a little boastful. I don't mean it that way. I'm equally impressed by the things other people make. Whether it's a sewing project, a knitting project, or some other medium, I think it's really awesome that somebody took the time to make something when it would save time, effort, and frustration to find one at a store. Even with the enormous satisfaction I get from completing projects, there are some that really make me step back and smile. This sweater is one of those projects. I love everything about it. The pattern is Lemongrass by Joji Locatelli. I'm crushing hard on Joji's patterns lately. In fact, I knit three of them in a row (Neon, Looking Back) and am having a hard time talking myself out of a fourth and a fifth. Aside from the obvious reason- theses are some good looking sweater designs, the thing that has me hooked is Joji's pattern writing. In the day and age of Ravelry and self-publication, A LOT of people are out there trying their hand at design. This is a great thing. More ideas means more variety and a bigger selection for those of us in the market for patterns. The downside is that a lot of people do what I like to call "Mad Lib" pattern writing. They insert BLANK stitch pattern into a basic sweater formula, slap a new name on it, and, essentially, sell you the same pattern over and over again. It annoys me. I have a stitch dictionary at home, thank you very much. If a designer wants my money, they've got to give me something in return; show me something I haven't seen before. I know it's not easy. I've knit more than 50 sweaters (I can hardly believe that) and covered a lot of ground doing it. That's why I'm willing to pay- somebody had to work a little bit to put the thing together. Joji is the real deal. She has incredible range in her design catalog. More impressively, she uses completely different methods of construction and technique in each of the patterns I've tried. Also, I love that her designs take me to the edge of my comfort zone in terms of shape and silhouette- something I'm trying do a lot of lately. Alright, alright,I think you get my point. Enough gushing. Now.... Allow me to point out the elephant in the room. My right sleeve is TOTALLY shorter than my left sleeve. I have worn this sweater several times since taking photos of it, and I didn't notice until I started adding pictures to this post. HA! Good thing those sleeves are top down. Good thing I have yarn left. "The only difference between an experienced knitter and new knitter is that the experienced knitter makes bigger mistakes faster." ~Stephanie Pearl McPhee Tell me, do you have a favorite sweater pattern or designer? Or, have you walked around with two different length sleeves? Please tell me I'm not alone.
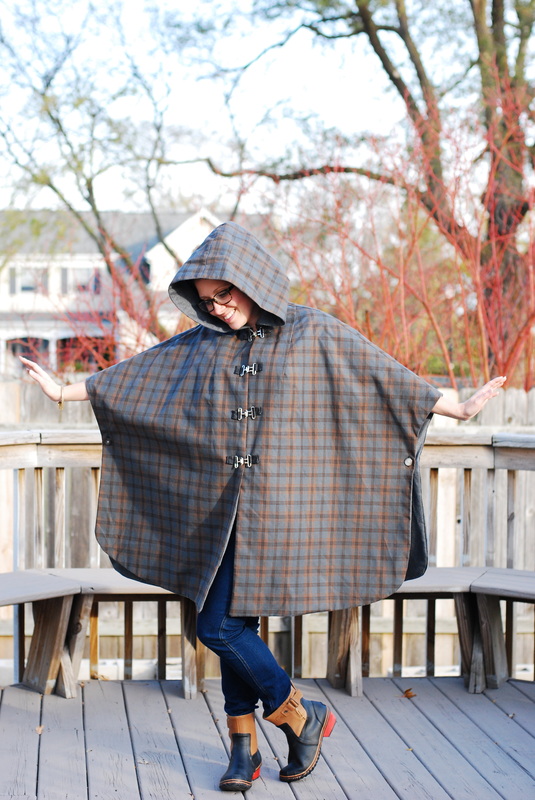
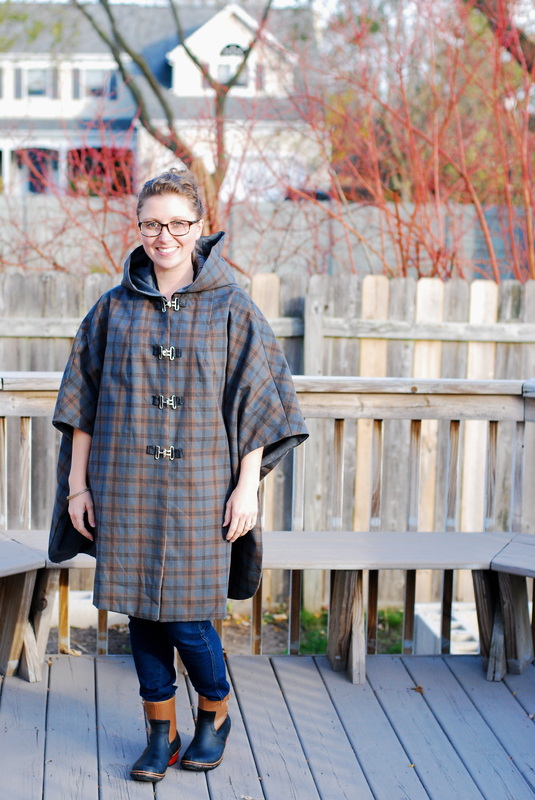
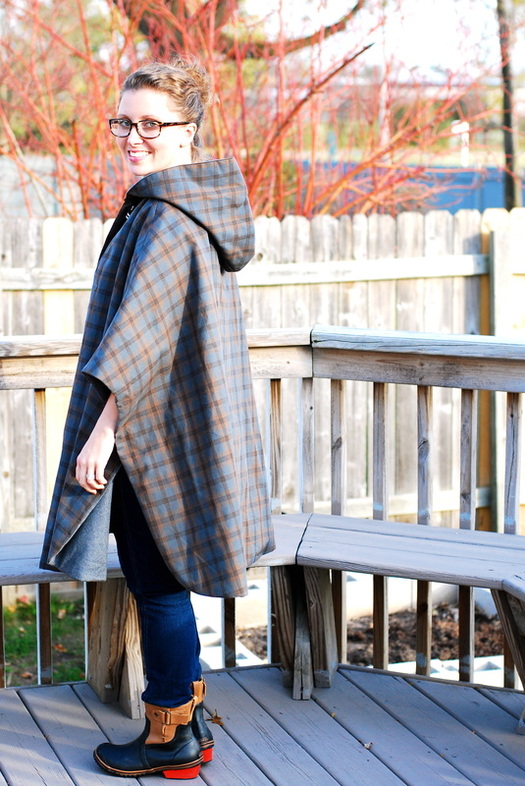
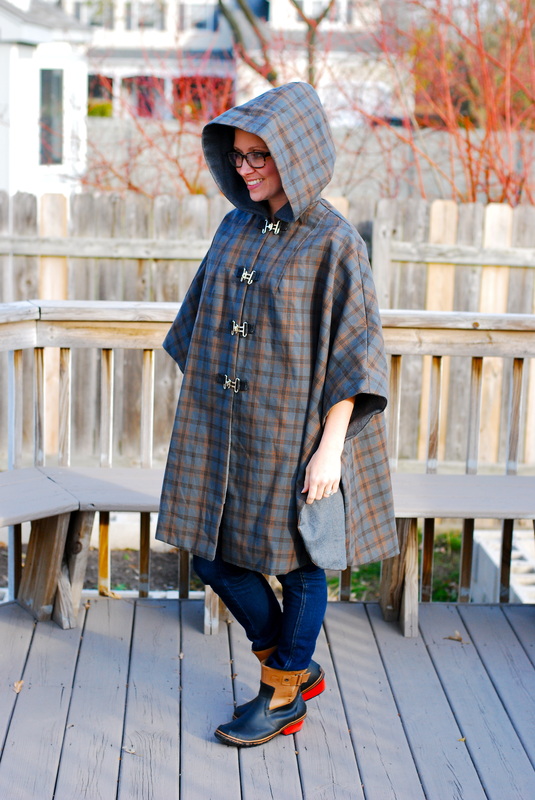
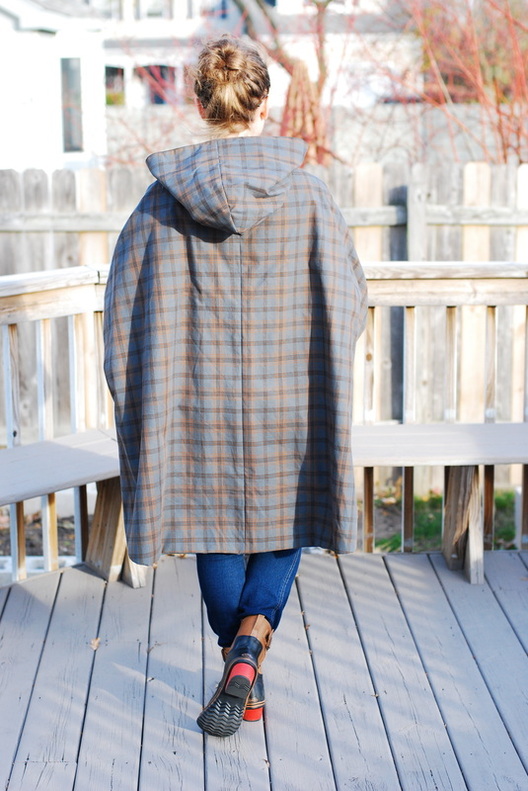
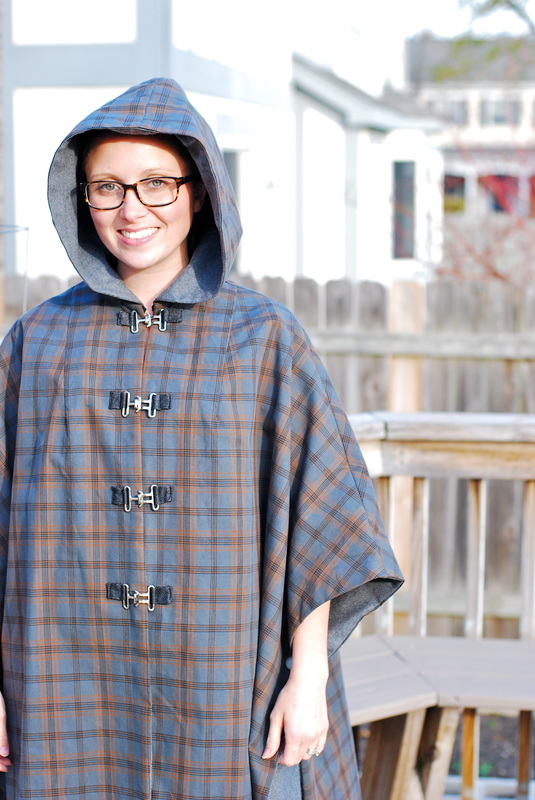
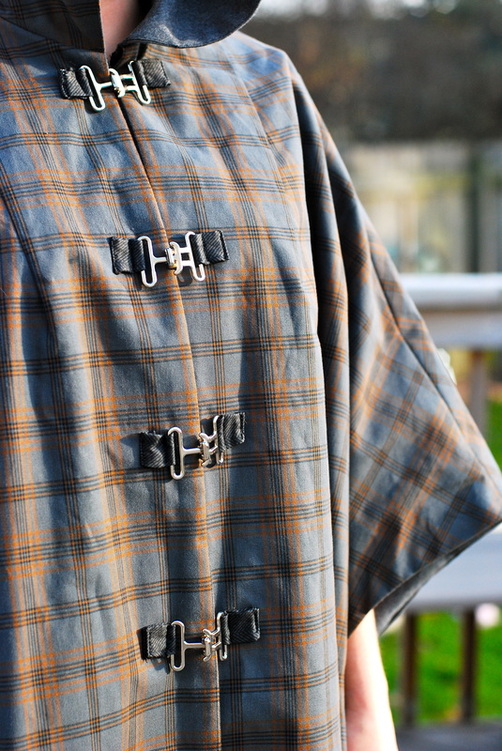
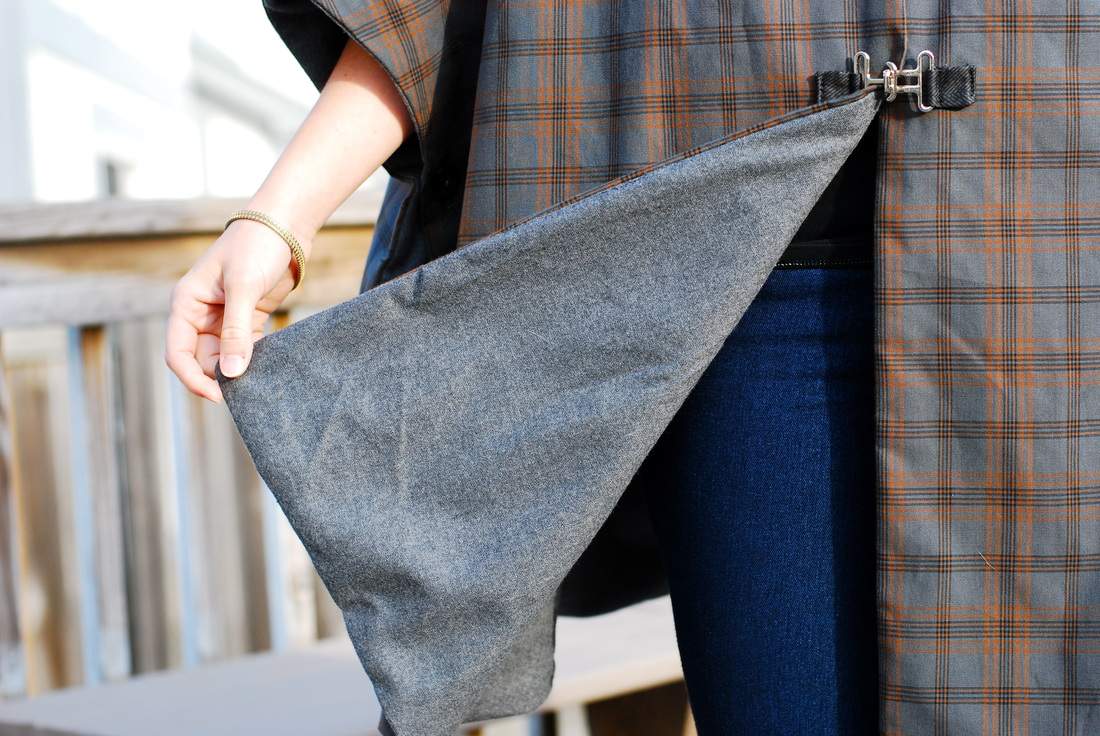
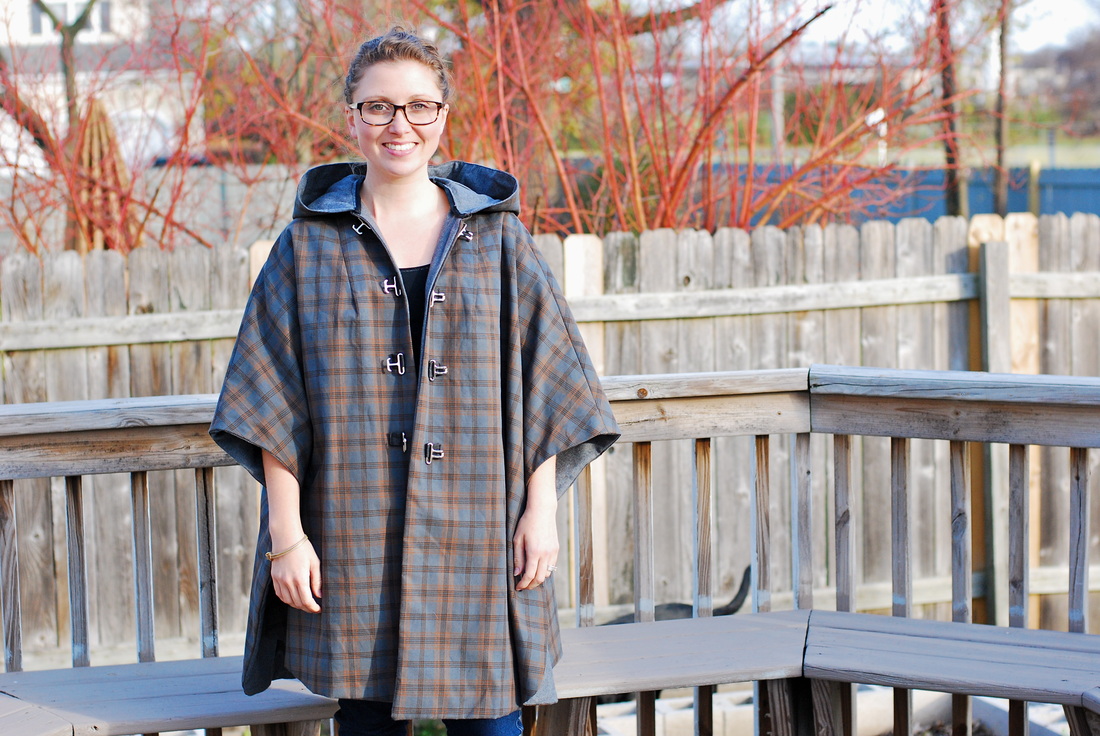
I interrupt the ongoing sweater parade to bring you, sewing. Because, balance. Allow me to present my most favorite thing I've ever sewn. EVER. "They" say that necessity is the mother of all invention. This cape is no exception. It all started when we moved to the burbs... With our new house came a new commute, and with that new commute came a lengthy walk between the train and work. When we lived in city limits, the majority of my commute could be traveled underground along the pedway. If you haven't spent a lot of time in Chicago, you might not know that we have a system of underground pedestrian tunnels that link our major transportation lines with many predominant Chicago office buildings. They're FANTASTIC in adverse weather: cold, snow, rain, and for avoiding tourists in the busy season! My old route to work linked my building directly to the train without the need to come above ground. It was glorious. But, like Jonie says... Since the move, I take a completely different train line from a completely different direction of the loop. There is no pedway along my new route. What's worse, I have to walk the bridge over the river. That isn't a bad thing, unless it's raining or windy (so most of the time). Being over a body of water adds an extra element of suck to those already unpleasant weather conditions. I swear, It rains in 360 degrees when you're on the bridge. All this complaining to say, until I sewed this rain cape, I was defenseless. Umbrellas and rain boots can't help you when that rain is coming down sideways (ask me how I know). What's worse, I used to LOVE the rain, especially a good thunderstorm, and this new commute definitely created a situation of love-lost between us. Something had to be done. I started searching for raincoat fabrics. I considered taking a play from Meg's book and using a shower curtain. Then I found this beautiful, reversible (plaid on one side herringbone on the other) coated cotton rainwear fabric and fell in love. I found it on Britex's website (sold out), and it was perfect. The only downside, it was $50 a yard. I needed 3. OUCH. I told myself that I would search a while longer for a substitute, and if I didn't find one that gave me the same feels this did, I'd bite the bullet and go for it. So, I searched a little more. Then, I found it. The same flipping fabric! It was being sold on fashionfabricsclub for... wait for it... $5.95 a yard (sold out)! My heart went pitter patter. When it arrived on my doorstep, it didn't disappoint. It's a mid-heavy weight cotton, similar to the fabric is a sturdy trench coat. It doesn't have a lick of vinyl or nylon in it, and it's very soft and pliable. My main objective with this cape was to protect as much of my body from the elements as possible. I also wanted to stay warm and be able to wear it through multiple seasons. It's cold almost 9months out of the year here in the Midwest. And, we could have rain during any of the four seasons. Inspired by those plastic ponchos they hand out on boat tours of Niagra Falls, I got to work. I had a perfect pattern waiting in my vintage pattern stash, which meant I was able to add another project to my #VintagePledge. Simplicity 5676 view 1. This pattern is simple, simple, simple. The pattern has a size printed on it, but I feel this is OSFM sort of garment. To achieve the illustrated length on the pattern envelop, I could have shortened it a bit. For my purposes, the more coverage, the better. So, I left it as drafted. The pattern is essentially two front pieces, two back pieces, and a hood. There are darts on both the front and back of the poncho. Also, there are darts to shape the hood. Buttons on each side create armhole openings and help to hold things together when it gets windy. I decided to modify my cape slightly and left the front seam completely open. I wanted the ease of being able to get this thing on and off without pulling it over my head. Leaving the front open means there are only three seams to construct the cape (center back, shoulders, hood). Now, mind you I did all this twice in order to fully underline my cape. My lining fabric is wool flannel. It's completely gorgeous. I bought six yards of it at an estate sale (you're probably sick of reading that). It still has the online distributor sticker on it; I love when that happens. It cost me $2. Amazing. I matched up the lining and outer cape with the right sides together. Starting from the top front, I sewed the pieces together all the way around the perimeter, leaving the neck edge open. I attached the hood lining in a similar manner. After, I pressed the seams toward the inside and turned things right-side-out. My hood/neck seams is the only exposed seam on this project. I finished it with binding and tacked it down to give it a more polished look. Using a lining on this cape meant forfeiting any visual elements of the herringbone print on the inside of the cape, but I do think it looks nicer this way. It' also a lot warmer, and this project is about function over fashion. Although, I actually really, really love the way this cape looks; Niagra Falls chic. I was able to incorporate the herringbone when I attached the toggle buckles. It's not overt, but it's there. The buckles are the perfect finishing touch for this project. I stewed over them longer than it took me to sew this whole thing, and it was worth it. They're the star feature of this project. I have about 1/2 yard +some scraps of fabric left, and I'm thinking I might try my hand at making a cross-body messenger style bag, herringbone side out, to wear with this- you know, to keep the yarn dry. Do you have a favorite make?
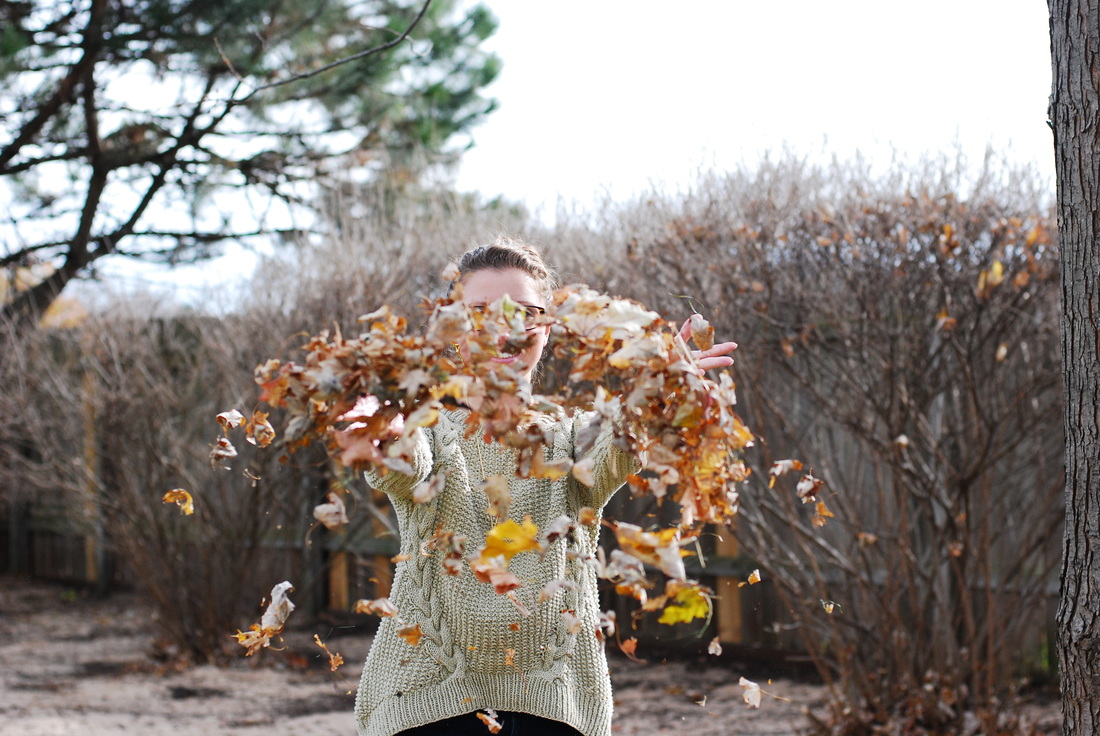
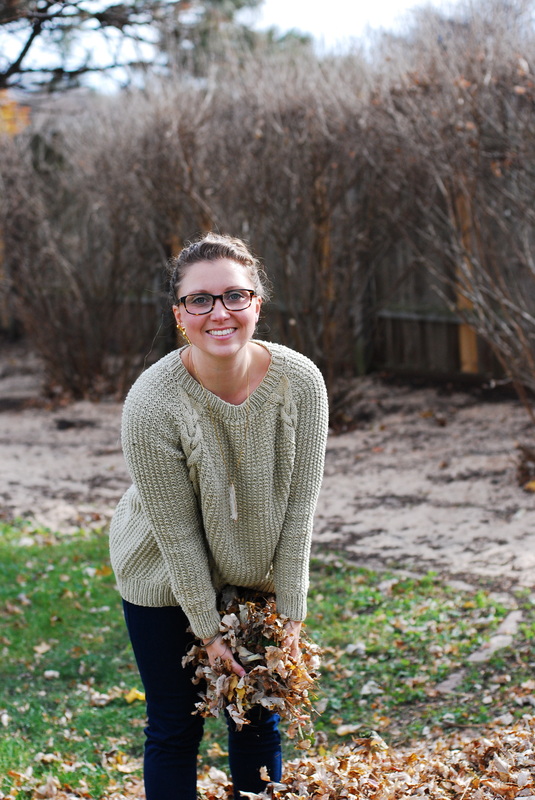
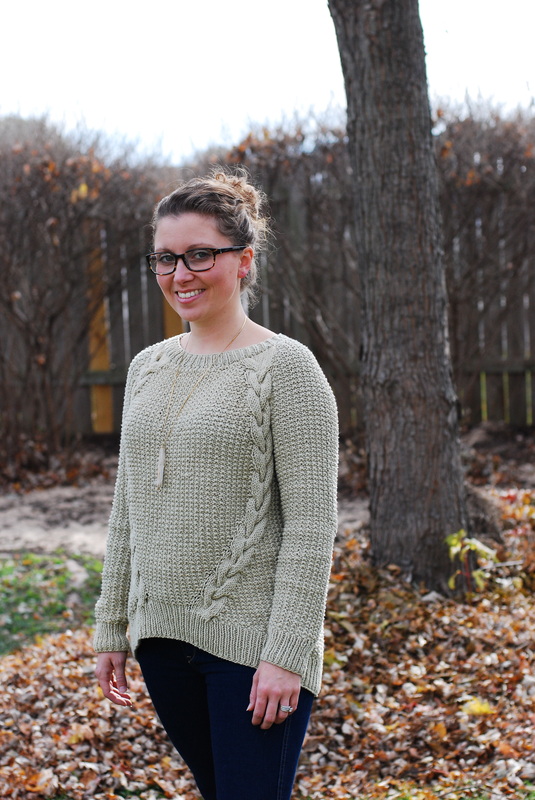
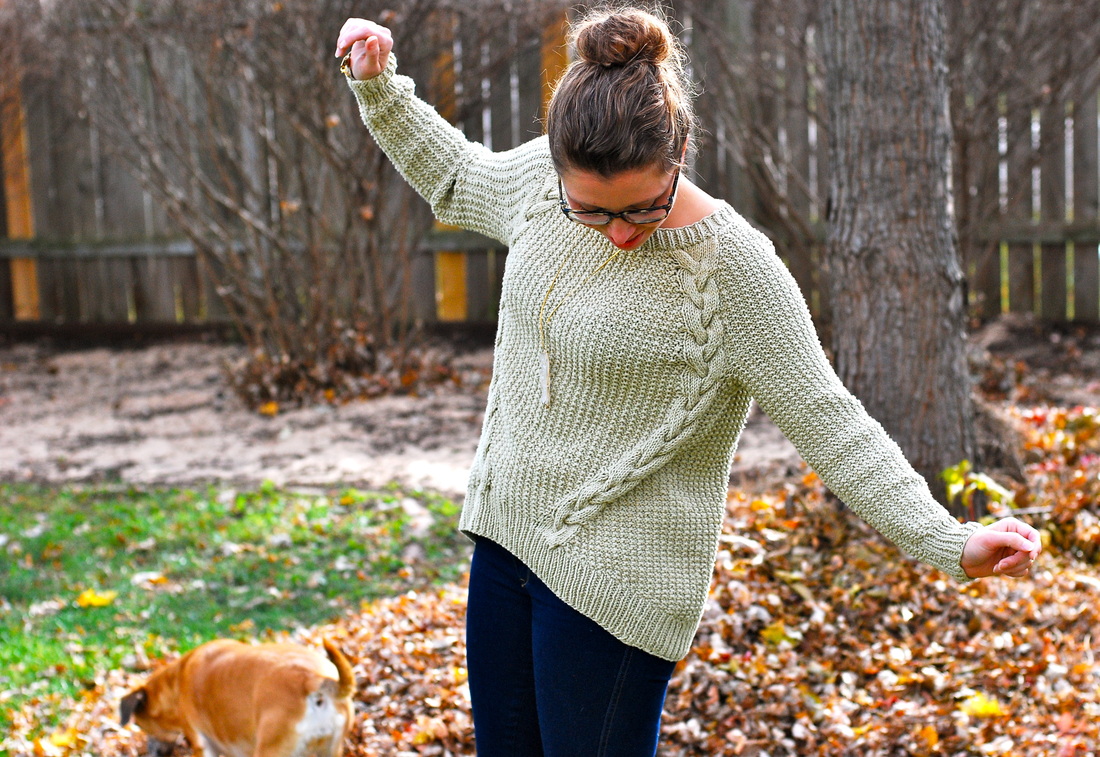
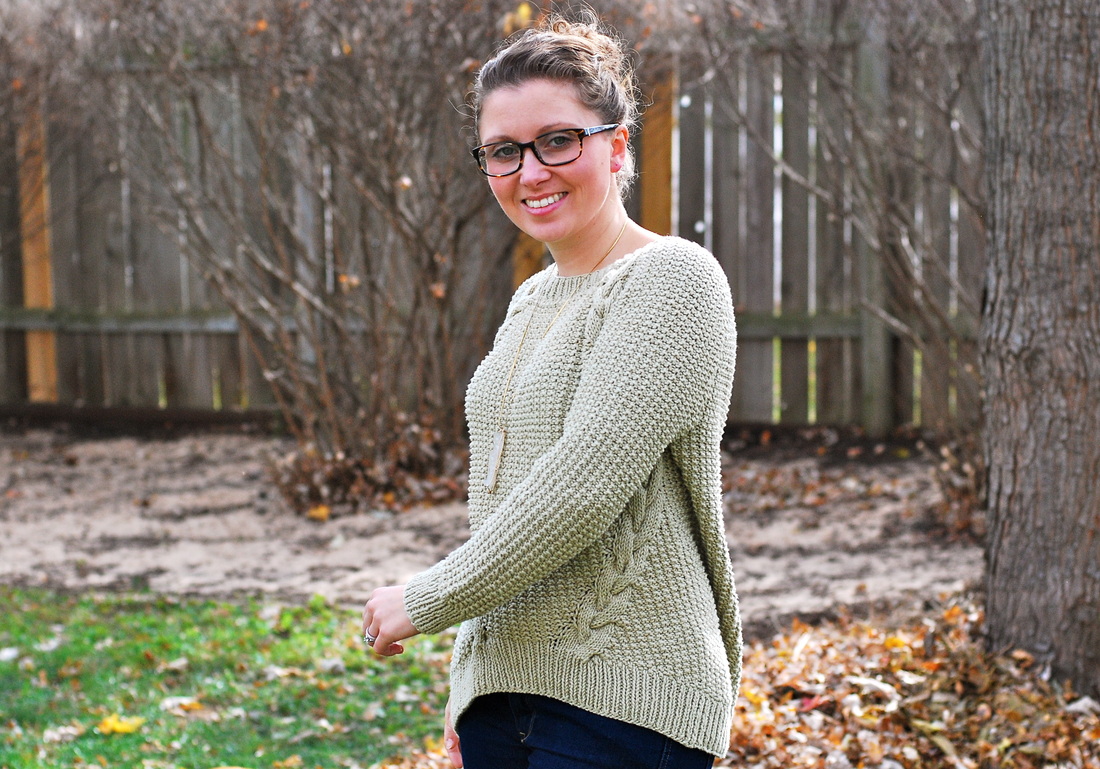
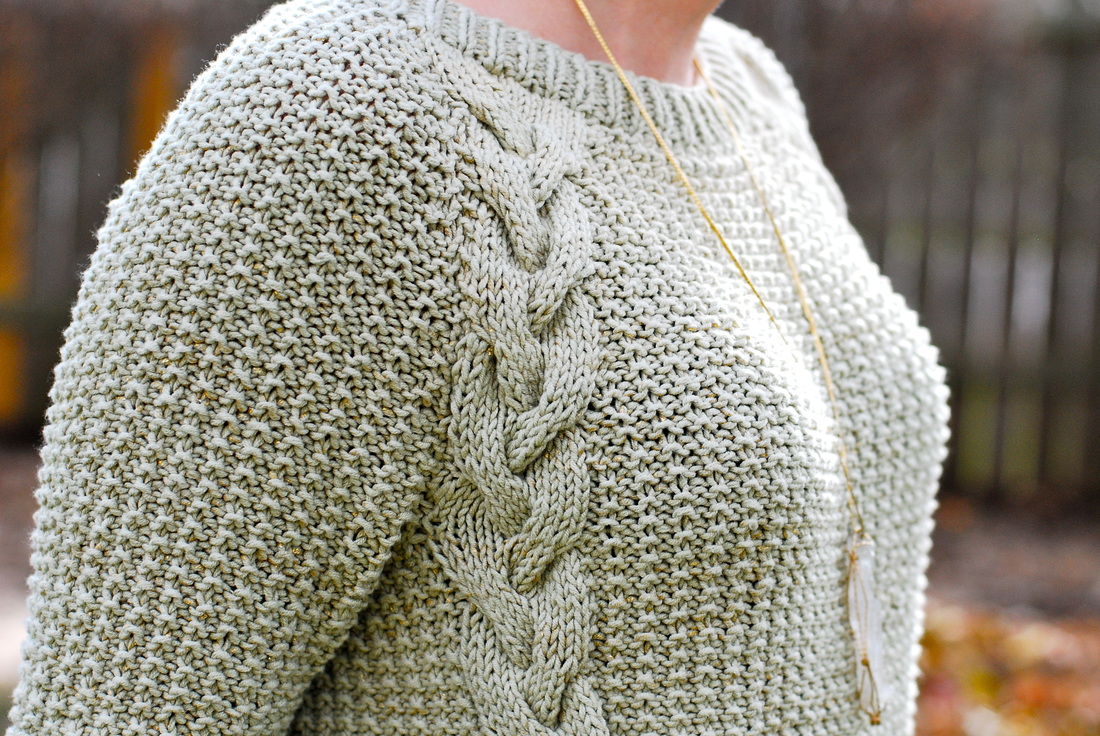
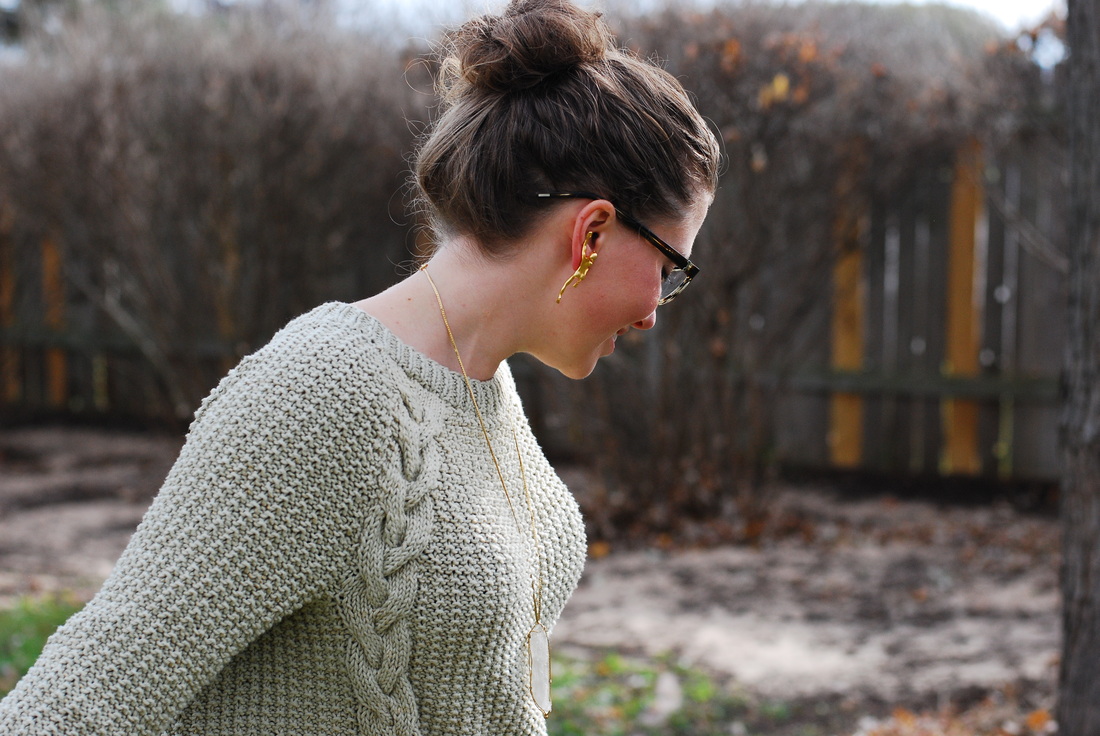
I told you those leaves were on the ground. I spent the better part of a Saturday raking them into a massive pile, an effort that yields no visible signs of productivity, as there are still leaves strewn about the lawn upon completion. No amount of careful raking seems to help. This is an especially irritating task for a person with compulsive tendencies. Oh, well. If you can't beat them, join them. There is something about a leaf pile that begs to be played in- and rain puddles. They bring out the kid in me. Besides, yard work is overrated. Ah, but you're here for the sweater. So, let's get on with it. Today, in projects from the pile of reckless FOs, is the Dagmar sweater by Handy Kitty. This, too, is knit in a cotton variety yarn. However, unlike my Neon sweater, the cotton lends very nicely to the drape and built-in positive ease incorporated into this design. The yarn I used is BLING BLING by Berroco, a currently discontinued variety purchased at the mother load of estate sales. This yarn is a cotton/acrylic/metallic blend. It's impossible to see in the photos, but it actually has bits of gold foil leafing throughout the strand. This yarn is something I would never have purchased for full price in a yarn store, but I was drawn to it. There's a lot of room for regret-free experimentation when the yarn is $1 a ball. After knitting with it, I have a feeling one of the reasons it was discontinued is that it sheds little bits of gold dust as it's knit. I felt like a knitter version of Rumpelstiltskin as I worked. However, the resulting sparkle effect is subtle and really perfect for a sweater pattern like this one where there's texture without an overwhelming amount of detail. The sweater is knit in the round up until the divide. There is a high-low hemline created through the use of short rows and a moving cable detail that creates a fun visual effect along the front of the body. The sleeves are a seamed raglan. This was the only tricky bit. I recommend that a knitter have a good handle on seaming before tackling this, because there is only a single buffer stitch between the edge and the cable pattern. If you miss, you'll be seaming into the cables. And, that would get messy looking fairly quickly. I suppose you could also incorporate a few 'bonus' stitches at the raglan edge to allow a little room for error. There is a large amount of positive ease built into the sweater. I knit the size medium, and it's roomy. It did grow a bit while I was wearing it, not as much as the 100% cotton I used in my Neon, but noticeably so. Between wearings I lightly wetted the bottom rib and tossed it in the dryer. It sprang back into shape beautifully without affecting the rest of the sweater. This is the type of sweater that probably couldn't be too big. I will definitely be able to carry this one into fall. It has MEGA layering potential and a huge cozy factor. This style is a bit outside my normal tailored and fitted silhouette. I've been doing that a lot lately, trying new shapes, and I'm excited to report that I'm pleasantly surprised by the things I've discovered I like. I love having a classic set of staples in my closet, but it's nice to throw-in a few curve balls now and again. I adamantly refuse to ever be trendy, but I worry that I'm at that age where it all starts to fall apart- like the woman who currently rocks the same haircut she had in the 80's, because that's when she hit the pinnacle of her style evolution. Do you mix it up and try new things?
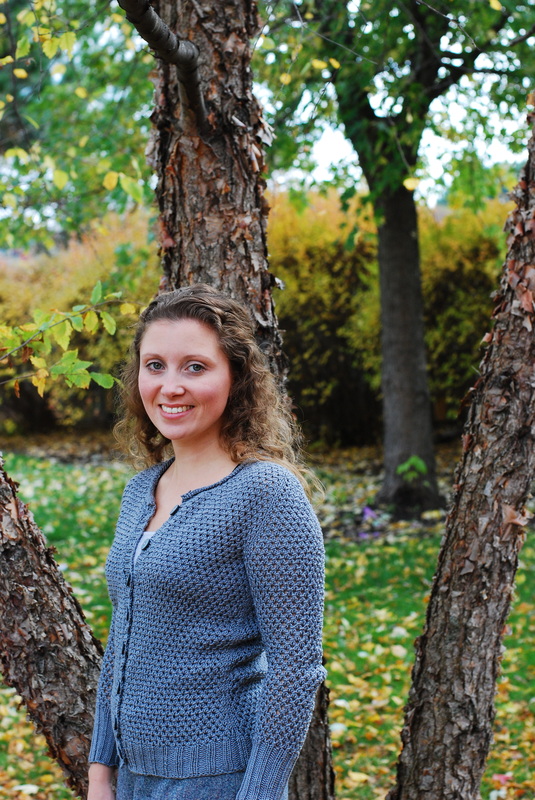
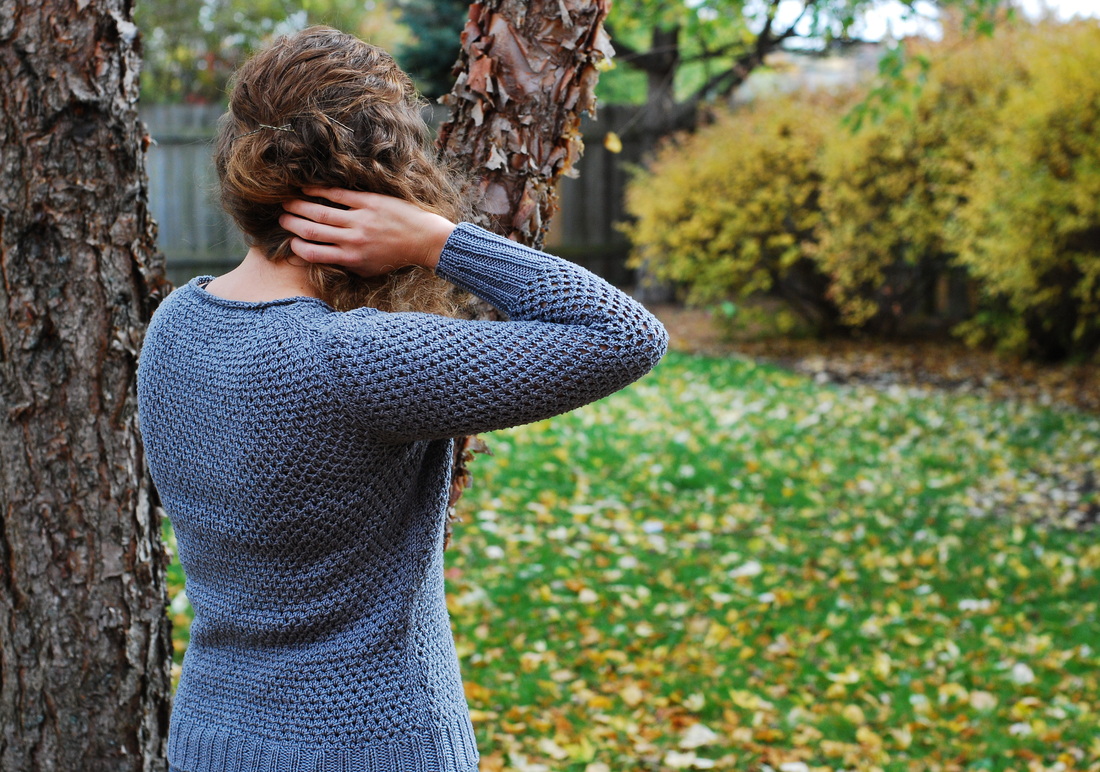
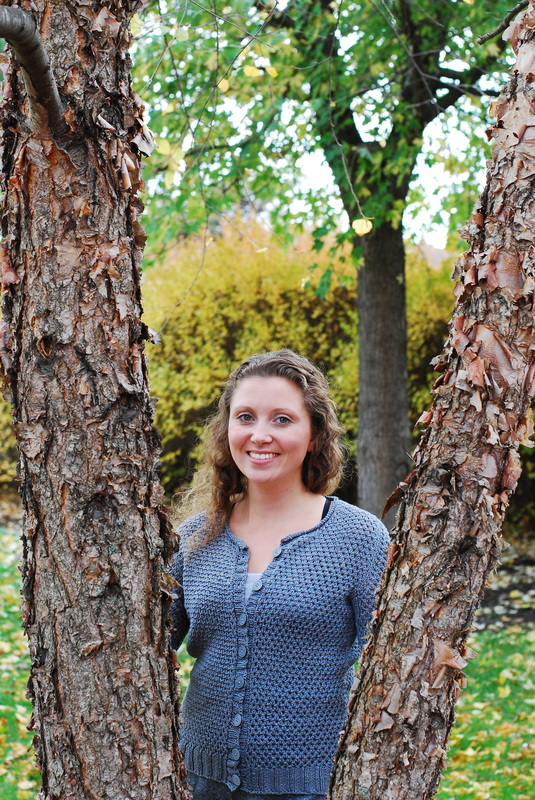
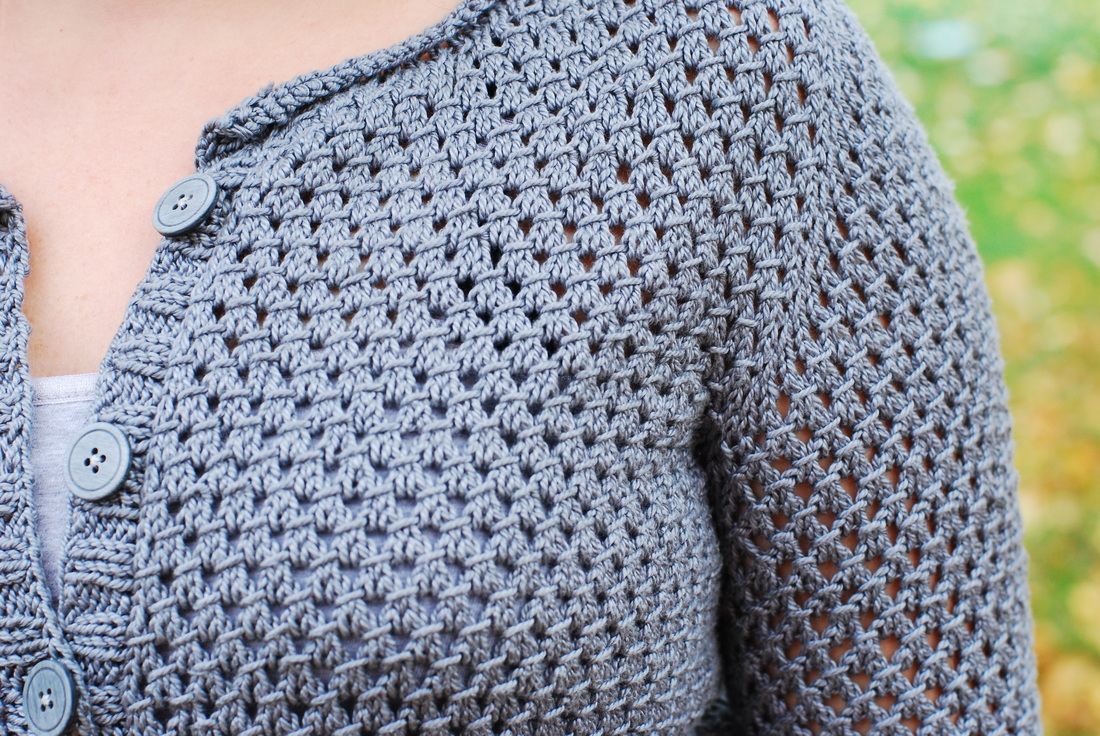
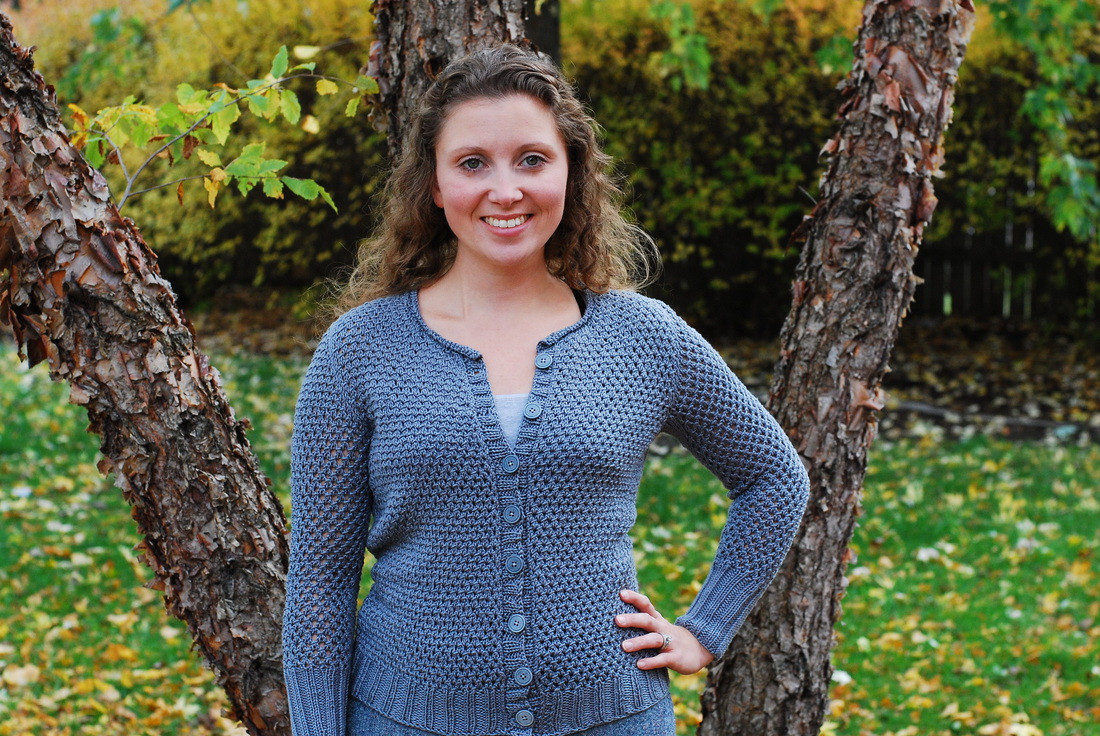
Let's keep this sweater train rolling, shall we? Today's sweater was knit using the Neon pattern by Joji Locateli. And, in an act of defiance, I knit it using the least neon yarn I could find. Ha. Not really, I just wanted/needed a good grey cardigan. I wear more grey and black than all other colors combined. Shamefully, I started and finished this sweater during the spring then left it to languish in the aforementioned pile. While there are leaves clinging to the trees in these pictures, they have since fallen. We've even (briefly) had snow. And, this cardigan's days are numbered (until next year). I used a 100% cotton yarn to knit it. It's a gorgeous strand with a tight twist a high shine factor. I have several more colorways of this yarn, all rescued from the dump, or at least that's what I imagine happens to the fabric and yarn not purchased at estate sales. Sad. Chicago winters are increasingly too brutal for cotton. Or lace. There is layering potential, over a wool dress, perhaps. I ended up with a bit more ease than I expected due to my inexperience with cotton yarn. I've become incredibly reliant on the 'memory' of wool. Cotton behaves differently and doesn't have the same recovery. On the up-side, it can take a restorative spin in the dryer without risk of felting. So, there's that. I'm definitely experiencing a learning curve while working with Cotton for adult garments. I plan to use it in rotation more regularly to fully enjoy year-round sweater wearing. I started knitting for the size 36 and increased to the stitch counts for the size 41 through the hip. This cardigan is knit from the top down using the contiguous method. The result is a much nicer fit through the shoulder and sleeve than a raglan or yoked top-down knit. At this stage in my sweater knitting endeavors, I really appreciate a pattern that tosses a new technique my way or gives me something extra to think about while I'm knitting. This is especially true when it comes to patterns I pay for. The Neon sweater definitely has some good design elements, and meets that requirement with the shoulder/sleeve construction. However, I'm not sure how I feel about the rolled neckline. I don't so much mind that it is an intentionally rolled edge, I just don't know how to wear it buttoned up. It's a really unfamiliar thing. Do I stack them at the overlap? Should they roll together? Burning questions. I'll likely not button the top button, ever, to avoid doing it wrong. That aside, I'm thrilled with my Neon, and I give the pattern two shining thumbs up. Do you knit with cotton? Do you have any pro-tips for me?
|
Archives
March 2017
|
