|
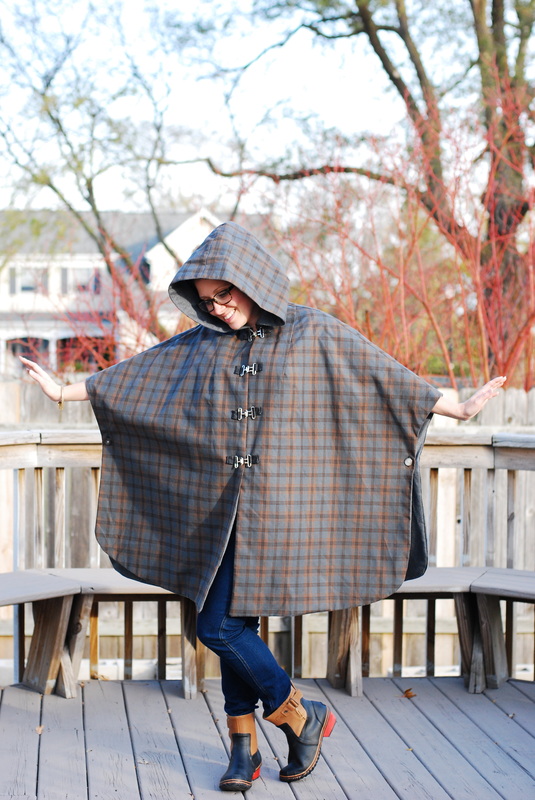
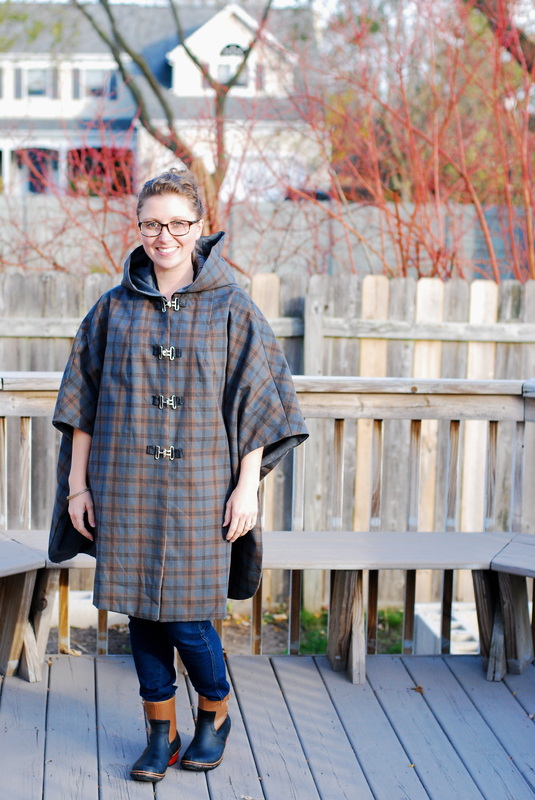
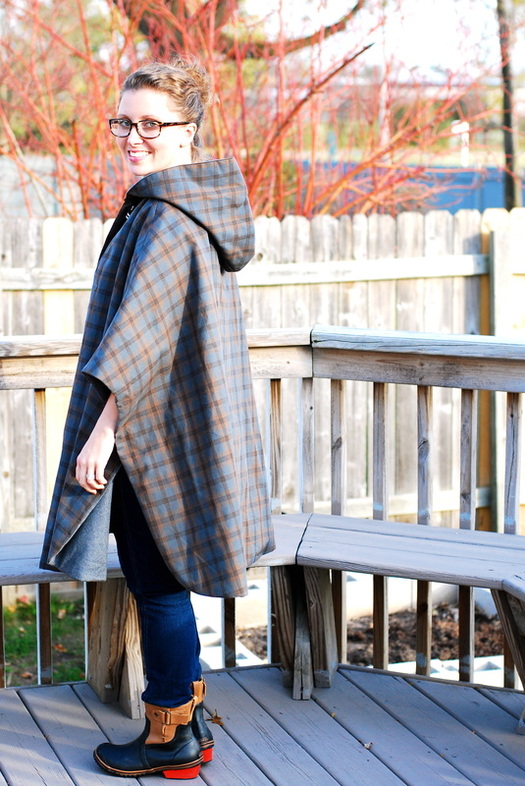
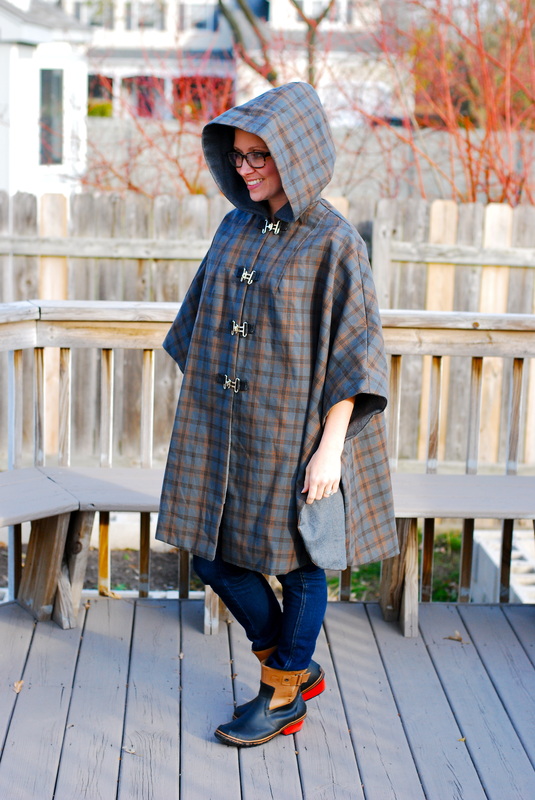
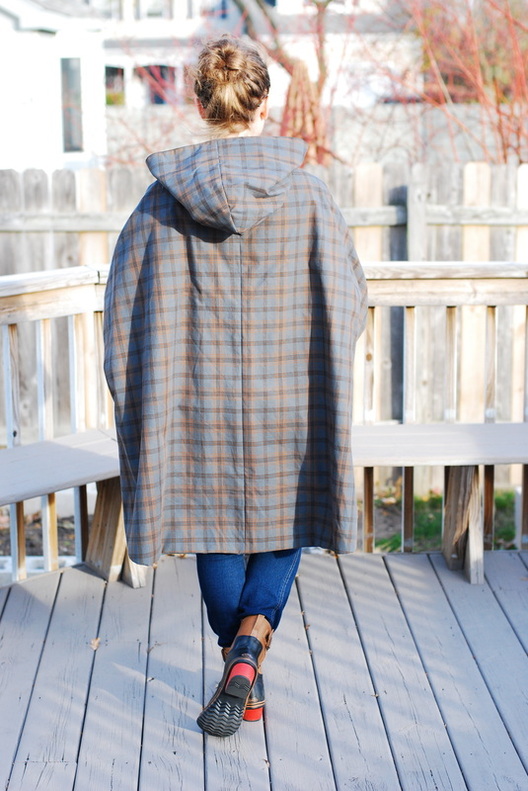
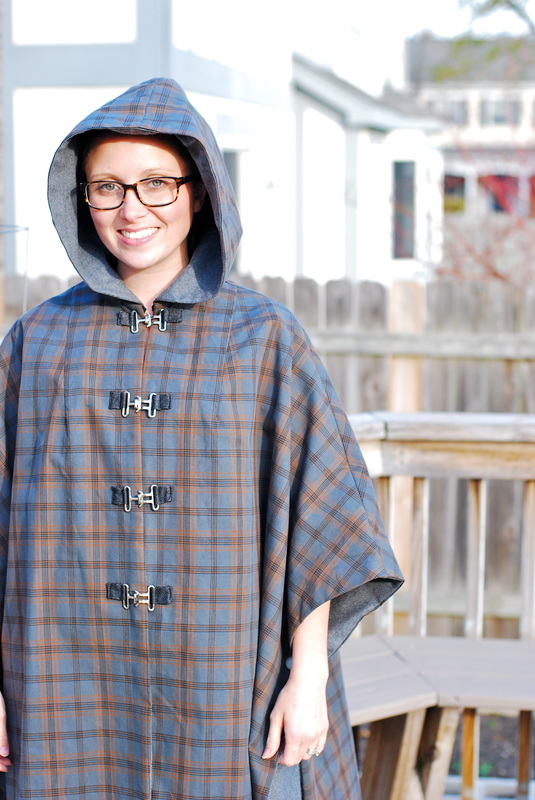
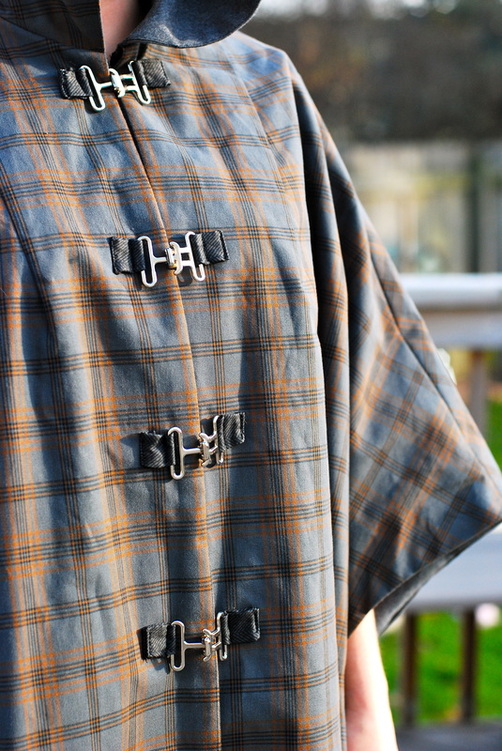
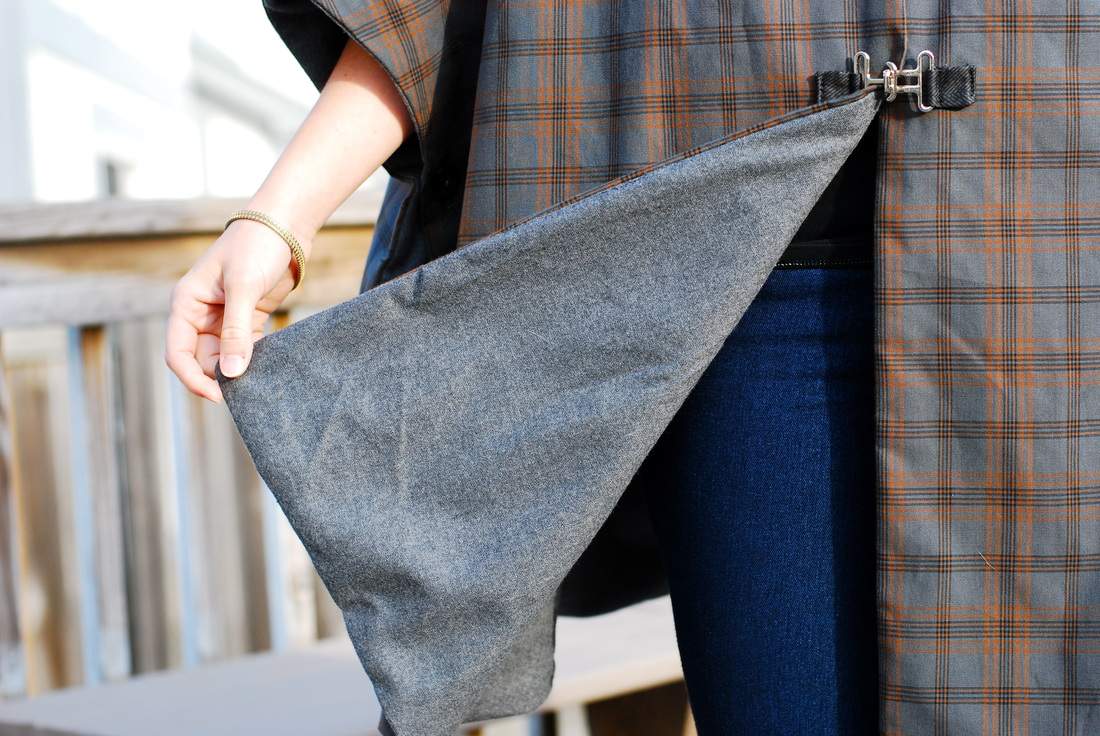
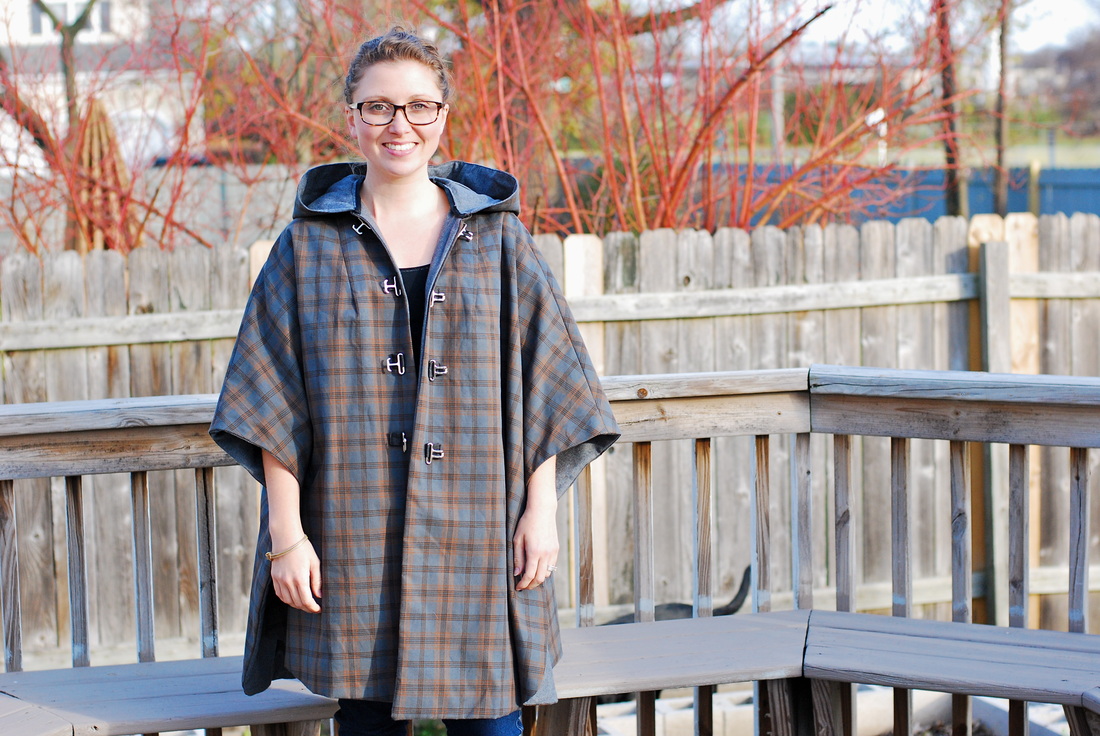
I interrupt the ongoing sweater parade to bring you, sewing. Because, balance. Allow me to present my most favorite thing I've ever sewn. EVER. "They" say that necessity is the mother of all invention. This cape is no exception. It all started when we moved to the burbs... With our new house came a new commute, and with that new commute came a lengthy walk between the train and work. When we lived in city limits, the majority of my commute could be traveled underground along the pedway. If you haven't spent a lot of time in Chicago, you might not know that we have a system of underground pedestrian tunnels that link our major transportation lines with many predominant Chicago office buildings. They're FANTASTIC in adverse weather: cold, snow, rain, and for avoiding tourists in the busy season! My old route to work linked my building directly to the train without the need to come above ground. It was glorious. But, like Jonie says... Since the move, I take a completely different train line from a completely different direction of the loop. There is no pedway along my new route. What's worse, I have to walk the bridge over the river. That isn't a bad thing, unless it's raining or windy (so most of the time). Being over a body of water adds an extra element of suck to those already unpleasant weather conditions. I swear, It rains in 360 degrees when you're on the bridge. All this complaining to say, until I sewed this rain cape, I was defenseless. Umbrellas and rain boots can't help you when that rain is coming down sideways (ask me how I know). What's worse, I used to LOVE the rain, especially a good thunderstorm, and this new commute definitely created a situation of love-lost between us. Something had to be done. I started searching for raincoat fabrics. I considered taking a play from Meg's book and using a shower curtain. Then I found this beautiful, reversible (plaid on one side herringbone on the other) coated cotton rainwear fabric and fell in love. I found it on Britex's website (sold out), and it was perfect. The only downside, it was $50 a yard. I needed 3. OUCH. I told myself that I would search a while longer for a substitute, and if I didn't find one that gave me the same feels this did, I'd bite the bullet and go for it. So, I searched a little more. Then, I found it. The same flipping fabric! It was being sold on fashionfabricsclub for... wait for it... $5.95 a yard (sold out)! My heart went pitter patter. When it arrived on my doorstep, it didn't disappoint. It's a mid-heavy weight cotton, similar to the fabric is a sturdy trench coat. It doesn't have a lick of vinyl or nylon in it, and it's very soft and pliable. My main objective with this cape was to protect as much of my body from the elements as possible. I also wanted to stay warm and be able to wear it through multiple seasons. It's cold almost 9months out of the year here in the Midwest. And, we could have rain during any of the four seasons. Inspired by those plastic ponchos they hand out on boat tours of Niagra Falls, I got to work. I had a perfect pattern waiting in my vintage pattern stash, which meant I was able to add another project to my #VintagePledge. Simplicity 5676 view 1. This pattern is simple, simple, simple. The pattern has a size printed on it, but I feel this is OSFM sort of garment. To achieve the illustrated length on the pattern envelop, I could have shortened it a bit. For my purposes, the more coverage, the better. So, I left it as drafted. The pattern is essentially two front pieces, two back pieces, and a hood. There are darts on both the front and back of the poncho. Also, there are darts to shape the hood. Buttons on each side create armhole openings and help to hold things together when it gets windy. I decided to modify my cape slightly and left the front seam completely open. I wanted the ease of being able to get this thing on and off without pulling it over my head. Leaving the front open means there are only three seams to construct the cape (center back, shoulders, hood). Now, mind you I did all this twice in order to fully underline my cape. My lining fabric is wool flannel. It's completely gorgeous. I bought six yards of it at an estate sale (you're probably sick of reading that). It still has the online distributor sticker on it; I love when that happens. It cost me $2. Amazing. I matched up the lining and outer cape with the right sides together. Starting from the top front, I sewed the pieces together all the way around the perimeter, leaving the neck edge open. I attached the hood lining in a similar manner. After, I pressed the seams toward the inside and turned things right-side-out. My hood/neck seams is the only exposed seam on this project. I finished it with binding and tacked it down to give it a more polished look. Using a lining on this cape meant forfeiting any visual elements of the herringbone print on the inside of the cape, but I do think it looks nicer this way. It' also a lot warmer, and this project is about function over fashion. Although, I actually really, really love the way this cape looks; Niagra Falls chic. I was able to incorporate the herringbone when I attached the toggle buckles. It's not overt, but it's there. The buckles are the perfect finishing touch for this project. I stewed over them longer than it took me to sew this whole thing, and it was worth it. They're the star feature of this project. I have about 1/2 yard +some scraps of fabric left, and I'm thinking I might try my hand at making a cross-body messenger style bag, herringbone side out, to wear with this- you know, to keep the yarn dry. Do you have a favorite make?
25 Comments
That is really a masterful and useful project, wow! Love it! It's a gorgeous poncho (which is a funny sentence to say, lol). I rarely bother with umbrellas (because hello, Chicago), but I don't know what I'd do without hooded raincoats. I absolutely DO NOT GET rain gear without hoods. Fortunately I found a brand that makes nice ones awhile back, so I have a fleece-lined version and a normal one. I used to have to do that same across-river commute and you're right, it's brutal! Now you can face it in style AND comfort. :)
Reply
I love this! UIC's campus is notoriously windy, even for Chicago, so I could definitely use one of these. I've had the wind snap umbrellas in half like they were twigs on campus! I really like the idea of making one of these out of a lightweight, waterproof fabric that I could wear in the summer or over a coat in the winter.
Reply
wonderful! practical and beautiful, it's always the best! funny to hear that Chicago also has a undeground network of pedestrian pathways. i'm from montreal and we have one there too, an it's many kilometers long, connecting metro stations, shopping centers and office buildings in the city center. it's really the best when snow is storming! in montreal it is totally a curiosity for tourists to check out though :)
Reply
11/12/2014 10:38:32 pm
This is super fantastic, Michelle! What a perfect rain cover-up. And flannel lining, too! I also swoon over that fabric as I'm a big fan of plaid. Sounds like it'll keep you dry during your commute. This is inspiring me to finally put some buttons on my neglected raincoat. I've been wearing it tied with its belt for two years now. Haha
Reply
Oh Michelle! I'm totally honoured that you've sewn such an incredible make for #vintagepledge! I'm quite literally blown away by how awesome it is and I'm so glad it protects you from the nasty elements. Also...what a bargain the fabric ended up being...I can't believe you managed to get it so cheaply in the end! Thanks again for taking part...your cape is now on Pinterest :o) https://www.pinterest.com/stitchodyssey/vintage-sewing-pattern-pledge/
Reply
11/13/2014 10:58:41 pm
That is an awesome poncho! And very practical as well. My brother lives in Chicago, and I have visited him several times. I can vouch for the fact you need something like this to stay warm!
Reply
Well this is all kinds of awesome! I've been thinking the last couple of years that I really need to make a raincoat. I never considered a cape - until now! What a brilliant idea. It gets pretty windy where I live too - right at the eastern end of lake Ontario and the start of the St Lawrence river (on the Canadian side). We're supposed to get gusts up to 80km/hr today - whee.
Reply
Leave a Reply. |
Archives
March 2017
|
